Embark on a comprehensive journey into the art and science of taxidermy with this complete guide. We delve into the intricate techniques required to preserve a diverse range of species, from the smallest shrew to the largest deer, providing detailed instructions and insightful comparisons across various animal groups. Discover the nuances of skinning, tanning, posing, and mounting, ensuring your creations achieve lifelike realism. Ethical considerations and legal requirements are also addressed, promoting responsible and sustainable practices within this fascinating field.
This guide provides a step-by-step approach to mastering taxidermy, equipping you with the knowledge and skills necessary to create stunning and accurate representations of the animal kingdom. Whether you’re a seasoned professional or a curious beginner, “The Complete Guide to Taxidermy: 50+ Species Covered” offers a wealth of information and practical advice to elevate your taxidermy skills.
Taxidermy Techniques Across Species
Taxidermy, the art of preserving animal specimens, requires diverse techniques adapted to the unique anatomical features of each species. This section details the variations in methods for different animal groups, emphasizing key differences and best practices. Successful taxidermy demands precision, patience, and a deep understanding of animal anatomy.
Skinning Techniques: Small vs. Large Mammals
Skinning small mammals like squirrels differs significantly from the process for larger mammals such as deer. Small mammals require delicate handling to avoid damaging the fragile skin, while larger mammals present challenges related to size and muscle mass.
| Step | Small Mammal (e.g., Squirrel) | Large Mammal (e.g., Deer) | Diagram |
|---|---|---|---|
| 1. Initial Incision | Small incision along the belly, extending from the sternum to the vent. Avoid cutting too deeply. | Larger incision along the belly, from the sternum to the base of the tail. Carefully separate the skin from the abdominal cavity. |
      Small Mammal:  |---/\---|
                     |       |
                     |-------|

      Large Mammal: |--------|
                    |        |
                    |--------|
|
| 2. Skin Separation | Use a blunt instrument (e.g., a dull knife or spoon) to carefully separate the skin from the underlying muscle and fat. Work slowly and methodically. | Use a sharp knife to carefully separate the skin from the underlying muscle and fat. Work from the incision outwards, ensuring the hide remains intact. May require more force. |
      Small Mammal:  o o o o o
                     \ / \ / \
                      -------

      Large Mammal:  O O O O O O
                     \ / \ / \ / \
                      ---------
|
| 3. Leg and Head Removal | Carefully separate the skin around the legs and head, using small, precise cuts. Take care not to damage the delicate skin. | Sever the legs at the joints and carefully separate the skin around the neck, working towards the head. Use a sharp knife. |
      Small Mammal:  (Head)  (Legs)
                     /     \
                    /       \
                   /         \

      Large Mammal: (Head)  (Legs)
                     /     \
                    /       \
                   /         \
|
| 4. Final Skinning | Once the skin is separated from the body, carefully turn it inside out to complete the skinning process. | After removing the legs and head, carefully turn the skin inside out to complete the skinning process. This may require additional tools and assistance. |
Both: [Inside-out skin]
|
Preparing and Tanning Bird Hides: Waterfowl vs. Songbirds
Proper preparation and tanning are crucial for preserving bird specimens. Waterfowl, with their dense plumage and oily skin, require different treatments than songbirds with their delicate feathers.
Preparing and tanning bird hides involves several key steps. These steps ensure the hide remains flexible and prevents decomposition.
The following steps apply to both waterfowl and songbirds, but specific techniques and materials may vary based on the bird’s size and type of plumage.
- Careful Skinning: Begin with a careful incision along the belly, avoiding damage to the feathers and skin. Separate the skin from the body using a blunt instrument.
- Fleshing: Remove all remaining flesh and fat from the skin using a fleshing knife or similar tool. This is critical to prevent decomposition and insect infestation.
- Salting: Thoroughly salt the inside of the skin to draw out moisture and prevent bacterial growth. Allow the skin to salt for several days, depending on the bird’s size and climate.
- Washing: Rinse the salt off thoroughly with cool water, ensuring all salt crystals are removed. Do not soak the skin for extended periods.
- Tanning: Apply a tanning solution according to the manufacturer’s instructions. This process preserves the hide, making it flexible and durable.
- Neutralization: Neutralize the tanning solution with a neutralizing agent to stop the tanning process and prevent damage to the feathers.
- Drying and Finishing: Allow the skin to dry completely, ensuring it remains flexible. Apply a finishing oil or conditioner to maintain suppleness.
Differences between Waterfowl and Songbirds: Waterfowl often require additional degreasing steps due to the oil in their feathers and skin. Songbirds, with their more delicate feathers, require extra care during skinning to avoid damage. The tanning process may also need to be adjusted depending on the bird’s size and plumage type.
Taxidermy of Fish, Reptiles, and Amphibians
Preserving fish, reptiles, and amphibians presents unique challenges due to their varied anatomical structures and skin types.
| Animal Group | Preservation Methods | Challenges |
|---|---|---|
| Fish | Formality injection, freezing (for short-term preservation), or taxidermic mounting (for larger specimens). Proper scaling and preservation of coloration are crucial. | Maintaining the natural coloration and texture of the skin; preventing decomposition; and accurately replicating the fish’s natural posture. |
| Reptiles | Tanning or borax preservation. Careful skinning and fleshing are essential. | Maintaining the scale structure and coloration; preventing decomposition; and achieving a lifelike pose. Some species require specialized techniques due to their unique skin characteristics. |
| Amphibians | Formality injection, borax preservation, or freeze-drying (for larger specimens). Maintaining the skin’s moisture balance is critical. | Maintaining the skin’s moisture balance and preventing desiccation; accurately preserving the skin texture and coloration. Some species have particularly delicate skin. |
Tools and Materials for Taxidermy
Appropriate tools and materials are essential for successful taxidermy. The specific tools required will vary depending on the species being preserved.
| Animal Group | Tools | Materials | Notes |
|---|---|---|---|
| Mammals | Scalpels, fleshing knives, skinning knives, bone saws (for larger mammals), measuring tapes, sewing needles, etc. | Tanning solutions, borax, salt, preservatives, mounting forms, sewing thread, etc. | The size and type of tools will vary depending on the size of the mammal. |
| Birds | Fine-pointed scissors, small scalpels, fleshing knives, needles, etc. | Tanning solutions, borax, salt, artificial eyes, mounting forms, etc. | Delicate tools are needed for handling bird skin and feathers. |
| Fish | Sharp knives, forceps, measuring tapes, etc. | Formality, preservatives, mounting boards, etc. | Proper tools are needed to maintain the fish’s scale structure and natural coloration. |
| Reptiles & Amphibians | Scalpels, fleshing knives, etc. | Borax, preservatives, mounting forms, etc. | The choice of tools and materials will depend on the specific reptile or amphibian species. |
Advanced Taxidermy

Mastering the art of taxidermy extends beyond the basic techniques of skinning and fleshing. Achieving truly lifelike results requires a deep understanding of anatomy, posing, and mounting, skills honed through practice and a keen eye for detail. This section delves into the advanced aspects of taxidermy, focusing on creating realistic poses and mounting specimens with precision and artistry.
Realistic Posing for Various Animal Species
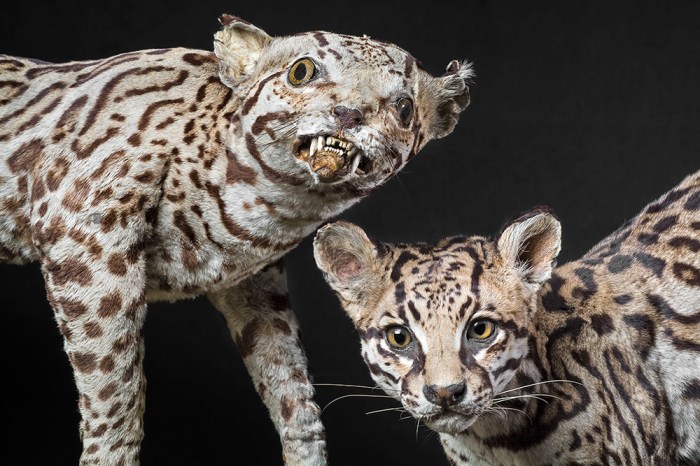
Creating a believable pose necessitates a thorough understanding of the animal’s anatomy and natural behavior. The pose should reflect the species’ typical posture, whether it’s a relaxed stance, a predatory crouch, or a graceful flight. For instance, a large cat, such as a lion, might be posed in a relaxed posture, perhaps lying down with one paw extended, showcasing the powerful musculature and the elegance of its form. The head should be subtly turned, mimicking a moment of alert awareness, rather than a stiff, unnatural position. Conversely, a bird in flight requires careful consideration of aerodynamics and wing position. The wings should be angled correctly, showing the curve of the feathers and the subtle tension in the muscles. The body should be slightly tilted, reflecting the forces at play during flight, creating a dynamic and visually arresting piece. The head should be turned slightly, suggesting direction and movement. Careful attention to these details will transform a static mount into a dynamic representation of life.
Mounting a Mammal Head on a Custom-Made Manikin
Manikin selection is crucial for a successful mount. The manikin should accurately reflect the size and shape of the animal’s head and neck. Consider factors such as the species, age, and sex of the animal when choosing a manikin. Once the appropriate manikin is selected, carefully fit it to the tanned skin. This often involves careful stretching and shaping to ensure a snug fit without distortion. Begin by carefully positioning the skin over the manikin, ensuring that all features are aligned correctly. Secure the skin using appropriate adhesives and stitching techniques, paying close attention to detail around the ears, eyes, and mouth. The final step is meticulously grooming the fur or hair to achieve a natural appearance.
Creating Lifelike Eyes for Taxidermy Specimens
The eyes are a critical element in conveying life and realism in a taxidermy mount. Several types of taxidermy eyes are available, including glass eyes and plastic eyes. Glass eyes offer superior clarity and realism, reflecting light in a way that mimics the natural shine of an animal’s eyes. However, they are more fragile and require careful handling. Plastic eyes are more durable and less expensive but may lack the same level of realism. Regardless of the material chosen, the size, color, and shape of the eyes should be carefully selected to match the species and age of the animal. Proper placement of the eyes within the socket is crucial for achieving a natural look. The eyes should be set at the correct depth and angle to convey the appropriate expression.
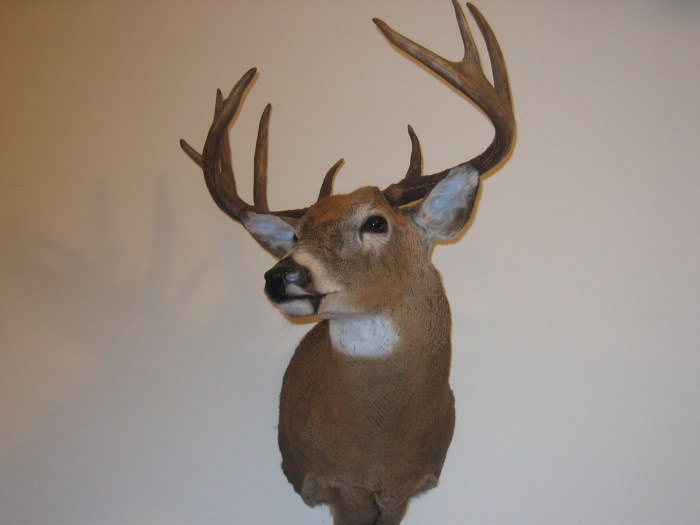
Armature Construction for Supporting and Posing Larger Animals
Larger animals, such as deer or bears, require robust armatures for support and posing. The armature provides a framework to which the tanned skin is attached, allowing the taxidermist to create and maintain the desired pose. The armature should be constructed from strong, lightweight materials, such as wire, wood, or metal rods. The design of the armature should accurately reflect the animal’s skeletal structure, providing support at key points, such as the limbs, spine, and neck. The armature is typically constructed before the skinning process, with careful measurements taken to ensure a proper fit. For a deer, the armature might involve a series of wire supports forming the legs and body, while a bear might require a more complex structure using metal rods and wood to maintain its weight and pose. The armature is then carefully covered with the tanned hide, ensuring proper alignment and a natural appearance.
Ethical Considerations and Legal Aspects
Taxidermy, while a fascinating art and skill, carries significant ethical and legal responsibilities. Practitioners must navigate complex issues surrounding animal welfare, legal compliance, and environmental impact to ensure their work is both aesthetically pleasing and morally sound. This section will Artikel these crucial considerations.
Ethical Sourcing of Specimens
The ethical sourcing of specimens is paramount in taxidermy. Obtaining animals illegally, through poaching or unethical hunting practices, is unacceptable. Taxidermists should only work with animals sourced legally and responsibly. This includes animals that have died of natural causes, legally hunted animals, or those obtained through permitted salvage operations. Working with legally acquired specimens ensures compliance with wildlife conservation efforts and helps prevent the depletion of endangered species. Furthermore, supporting ethical hunting practices that adhere to fair chase principles and utilize the entire animal contributes to responsible wildlife management. Rejecting specimens from questionable sources upholds the integrity of the taxidermy profession and promotes ethical wildlife practices.
Permits and Licenses for Taxidermy Work
Navigating the legal landscape of taxidermy requires careful attention to permits and licenses. Requirements vary significantly depending on location (state/province/country) and the species being processed. It is crucial to research and obtain all necessary permits *before* undertaking any taxidermy work. Failure to do so can result in significant fines and legal repercussions.
- United States: Many states require taxidermists to obtain a license to operate legally. These licenses often involve passing examinations demonstrating knowledge of taxidermy techniques and wildlife regulations. Specific requirements differ by state, so consulting the relevant state wildlife agency’s website is essential.
- Canada: Similar to the US, Canadian provinces and territories have their own licensing and permitting systems for taxidermists. Contacting the provincial or territorial wildlife agency will provide specific details.
- Europe: European Union regulations regarding wildlife and endangered species are stringent. Permits and licenses are generally required for the possession, transport, and processing of many animal species. Compliance with CITES (Convention on International Trade in Endangered Species) regulations is essential.
- Other Countries: Taxidermy regulations vary widely across the globe. It is imperative to research the specific laws and regulations of the country where the work will be undertaken.
Humane Euthanasia Methods
When taxidermy involves animals that are euthanized specifically for the purpose, humane and ethical euthanasia is critical. The method chosen should minimize pain and suffering, adhering to both ethical guidelines and any applicable legal requirements.
- Captive Bolt Pistols: These devices deliver a quick and effective blow to the brain, resulting in immediate unconsciousness and death. Proper training and technique are essential for safe and humane use.
- Injectable Anesthetics: Certain anesthetics, administered by a qualified veterinarian, can induce painless death. This method requires careful consideration of dosage and species-specific factors.
- Other Methods: Other methods may be acceptable under specific circumstances and with appropriate veterinary guidance, but should always prioritize minimizing animal suffering.
It’s crucial to note that only appropriately trained individuals should perform euthanasia, and always in compliance with relevant laws and regulations.
Proper Disposal of Waste Materials
Safe and responsible disposal of waste materials generated during taxidermy is vital for environmental protection and public health. Proper disposal methods prevent the spread of disease and contamination.
- Sharp Objects: Knives, scalpels, and other sharp instruments should be disposed of in puncture-resistant containers designated for medical waste.
- Biological Waste: Animal tissues and organs should be disposed of according to local regulations, often through designated waste disposal services or incineration.
- Chemical Waste: Tanning solutions and other chemicals used in taxidermy must be disposed of responsibly, following the manufacturer’s instructions and adhering to local environmental regulations.
Ignoring proper waste disposal can lead to environmental contamination and potential health hazards. Following established procedures is a crucial aspect of ethical and responsible taxidermy practice.
Final Summary

Mastering the art of taxidermy requires dedication, precision, and a deep respect for the animals being preserved. This guide has provided a comprehensive overview of the techniques, ethical considerations, and legal aspects involved in creating lifelike taxidermy specimens. By understanding the intricacies of each step, from initial preparation to final mounting, you can achieve stunning results while upholding responsible and ethical practices. Remember, the goal is not merely to create a replica, but to honor the animal’s memory through accurate and respectful preservation.