Blending artistry and filmmaking, this exploration delves into the intricate world of taxidermy’s role in wildlife documentaries. We’ll uncover the techniques used to create lifelike animal specimens for film, examining ethical considerations, preservation methods, and the integration of taxidermy with camera angles, lighting, and visual effects. The journey will encompass the challenges and creative solutions involved in seamlessly blending the artificial with the natural, ensuring authenticity and storytelling integrity.
From ethically sourcing specimens and mastering preservation techniques to utilizing advanced camera work and visual effects, this comprehensive guide illuminates the crucial behind-the-scenes skills necessary for producing compelling and realistic wildlife films. We’ll cover the artistic nuances of taxidermy, exploring various methods, their pros and cons, and their suitability for specific cinematic needs. Furthermore, we’ll delve into the ethical considerations surrounding the use of taxidermy in filmmaking, offering alternative approaches where appropriate.
Preservation Techniques in Taxidermy for Film

Taxidermy plays a crucial role in wildlife filmmaking, providing realistic animal representations for close-ups, establishing shots, and even complex action sequences. However, the ethical sourcing of specimens and the choice of preservation methods are paramount, impacting both the film’s aesthetic quality and its ethical standing. This section explores the techniques and considerations involved in preparing taxidermied animals for the screen.
Ethical Considerations in Specimen Sourcing
Ethical sourcing is fundamental. Using legally obtained specimens from reputable sources, such as museums with established collections or licensed wildlife rehabilitators who have animals that have died of natural causes, is crucial. Purchasing specimens from questionable sources can contribute to illegal wildlife trafficking and harm conservation efforts. Filmmakers should prioritize transparency and readily disclose the origin of their specimens, promoting responsible practices within the industry. Furthermore, the use of ethically sourced, already deceased animals, avoids any unnecessary harm to wildlife populations. Alternatives such as high-quality animatronics or CGI should also be considered where appropriate.
Taxidermy Methods for Film
Several taxidermy methods offer varying degrees of realism and longevity. Traditional taxidermy, involving skinning, flesh removal, and mounting over a manikin, creates highly realistic specimens but is time-consuming and requires significant skill. This method is ideal for close-up shots demanding high detail. Freeze-drying offers a quicker alternative, preserving the animal’s form with minimal shrinkage. However, it can be less cost-effective than traditional methods and may not be suitable for all species. Finally, molding and casting offers a more affordable and less time-consuming route. However, this technique typically produces less detailed results, better suited for shots requiring less scrutiny.
Preserving a Bird Specimen for Close-Up Shots
Preparing a bird for a close-up demands meticulous attention to detail. The process begins with careful removal of the feathers, ensuring they remain intact. The flesh is then carefully removed, and the skin is cleaned and tanned using appropriate chemicals. A manikin, sculpted to the bird’s exact shape, is created, and the skin is carefully stretched and sewn onto it. The eyes are replaced with realistic glass eyes, and the beak is meticulously repaired and positioned. Finally, the feathers are carefully repositioned, recreating the bird’s natural plumage. High-quality, archival-quality materials are essential to ensure the longevity of the specimen and to maintain its visual appeal. For example, using acid-free materials in the construction of the manikin and avoiding harsh chemicals during the tanning process helps preserve the specimen.
| Method | Longevity | Cost | Suitability for Film |
|---|---|---|---|
| Traditional Taxidermy | 50+ years with proper care | High | Excellent for close-ups and detailed shots |
| Freeze-drying | 20-30 years | Moderate | Suitable for many applications, but detail might be compromised |
| Molding and Casting | Variable, dependent on materials | Low | Best for shots where high detail is not crucial |
Preparing a Small Mammal for Taxidermy
Preparing a small mammal requires delicate handling to minimize fur damage. Begin by carefully making an incision along the belly, avoiding the fur line. The internal organs are removed, taking care not to puncture the skin. The skin is then carefully peeled from the body, using a blunt tool to avoid tears. Once removed, the skin is cleaned and tanned using a suitable method appropriate for the species and its fur. A manikin is created, usually from foam or clay, and the skin is carefully stretched and sewn onto it, ensuring the fur lies naturally. Finally, the eyes and any other necessary details are added, completing the process. Using specialized tools designed for small animals and employing gentle techniques ensures the preservation of the fur’s quality and overall aesthetic appeal.
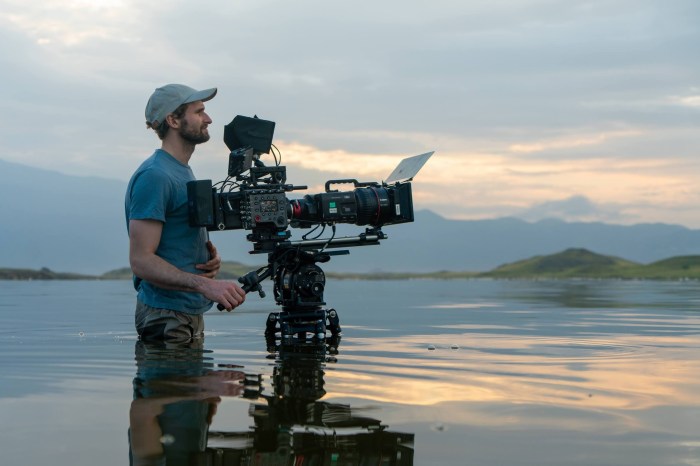
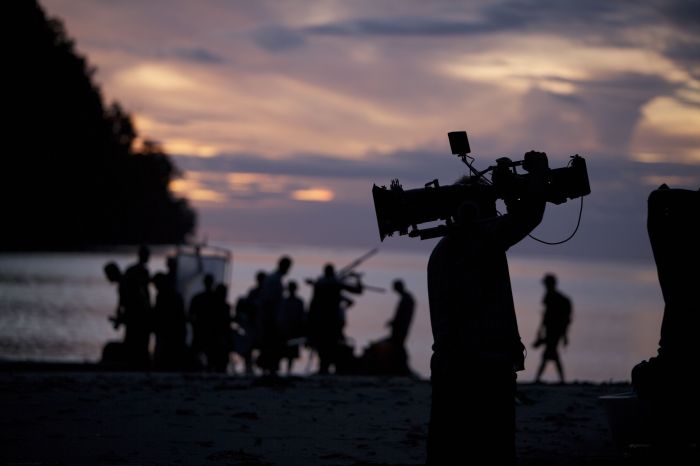
Camera Techniques and Wildlife Behavior

Capturing the essence of wildlife through the lens, whether it’s a live animal or a meticulously crafted taxidermied specimen, requires a nuanced understanding of camera techniques and animal behavior. The goal is to create a believable and engaging scene, seamlessly blending the artificial with the natural. This requires careful consideration of camera angles, lighting, and the ethical implications of using taxidermy.
Effective cinematography plays a crucial role in achieving this blend. By carefully choosing camera angles and lighting, filmmakers can enhance the realism of taxidermied animals, creating a convincing illusion of life within a film’s narrative. Conversely, unethical practices or poorly executed techniques can undermine the film’s credibility and raise ethical concerns.
Camera Angles and Shot Selection for Taxidermied Animals
Different camera angles and shots serve distinct purposes in showcasing taxidermied animals. A close-up shot, for example, emphasizes intricate details like fur texture or feather patterns, while a wider shot provides context within the environment. Low-angle shots can create a sense of power or grandeur, while high-angle shots can evoke vulnerability or smallness. The choice depends on the desired emotional response and narrative context. For instance, a close-up of a taxidermied eagle’s eye might emphasize its predatory nature, whereas a wide shot of the eagle perched atop a rocky outcrop could highlight its dominance within its habitat. Using a combination of these techniques allows filmmakers to tell a richer, more engaging story.
Lighting Techniques to Enhance Realism
Lighting is paramount in enhancing the realism of taxidermied animals. Soft, diffused lighting can minimize harsh shadows and create a natural look, mimicking the soft light of dawn or dusk. Conversely, directional lighting can highlight specific features, such as the musculature of a large cat or the intricate details of a bird’s plumage. The use of backlighting can create a sense of depth and separation from the background, making the animal appear more three-dimensional. Consider a scene featuring a taxidermied deer in a forest setting. Soft, diffused light filtering through the trees would create a naturalistic and serene atmosphere, enhancing the realism of the scene. In contrast, using a spotlight on the deer could create a dramatic effect, emphasizing its presence and potentially altering the mood of the scene.
Ethical Implications of Using Taxidermy in Wildlife Documentaries and Alternative Methods
The use of taxidermy in wildlife documentaries raises ethical considerations. Critics argue that it can perpetuate a culture of hunting and the exploitation of animals. Furthermore, if not carefully handled, it may misrepresent animal behavior or appearance. Alternative methods include using high-quality CGI, animation, or footage from nature archives. For instance, instead of using a taxidermied animal, filmmakers could use CGI to recreate a similar animal in a given environment, allowing for greater control over its movement and behavior, thus avoiding potential ethical concerns. However, using archival footage can limit creative control and might not always perfectly match the desired scene’s context.
Integrating Taxidermied Animals into Live-Action Scenes Using Visual Effects
Seamlessly integrating a taxidermied animal into a live-action scene requires advanced visual effects (VFX). The process typically involves several steps: first, meticulously filming the taxidermied animal in a controlled environment against a green screen. Next, this footage is digitally composited onto the live-action background, carefully matching lighting and shadows. Advanced techniques like rotoscoping and motion tracking are used to align the animal with the environment and to create the illusion of movement if needed. Finally, color correction and other post-production techniques are used to refine the composite, ensuring a believable and seamless integration. For example, a taxidermied wolf could be filmed separately against a green screen, then digitally added to a live-action shot of a snowy landscape, with VFX artists meticulously adjusting its fur to match the lighting and shadow of the background. The final result would be a convincing image of a wolf appearing naturally within its environment.
Storytelling and Visual Effects Integration
Integrating taxidermied animals into wildlife films presents a unique opportunity to blend artistry and realism, creating compelling narratives and visually stunning sequences. The careful consideration of narrative structure, visual effects integration, and workflow is crucial for achieving a believable and impactful final product. This section explores strategies for effectively using taxidermy specimens to enhance storytelling and overcome the challenges inherent in combining real and digital elements.
Effective use of taxidermy specimens in wildlife films relies on a strong narrative foundation. The specimens themselves should serve as integral parts of the story, not mere decorative elements. For instance, a close-up shot of a meticulously preserved bird of prey could symbolize the fragility of its ecosystem, while a wider shot depicting a taxidermied wolf alongside recreated environmental elements might convey the animal’s historical presence in a particular region. The narrative must dictate the placement and presentation of the specimens.
Strategies for Using Taxidermy Specimens in Storytelling
Using taxidermy effectively involves careful planning and execution. The narrative should guide the choice of specimens and their presentation. A dramatic close-up of a taxidermied eagle might highlight the power and majesty of the species, while a group of smaller, meticulously arranged specimens could tell a story of ecological diversity. The lighting, camera angles, and background elements all contribute to creating a compelling visual narrative around the specimens. Consider using different camera movements (like slow pans or zooms) to draw the viewer’s attention to specific details and create a sense of atmosphere. Furthermore, the condition of the taxidermy itself is critical; a poorly preserved specimen will detract from the overall impact.
Challenges and Solutions for Integrating Taxidermied Animals into CGI Environments
Integrating taxidermied animals into CGI environments presents several challenges. One major hurdle is achieving photorealistic integration. Differences in lighting, texture, and shadowing between the real specimen and the digital environment can create jarring discontinuities. Another challenge lies in accurately matching the scale and perspective of the taxidermied animal with the surrounding CGI elements. The solution often involves careful pre-visualization, meticulous lighting matching, and potentially the use of advanced compositing techniques. High-resolution scans of the taxidermied animal can help in creating a digital match, facilitating smoother integration and minimizing visible seams between the real and virtual elements. Careful attention to detail, such as matching the fur or feather texture, is crucial for creating a believable illusion.
Workflow for Creating a Short Film Sequence Featuring a Taxidermied Animal
Creating a film sequence with a taxidermied animal requires a collaborative workflow. The process begins with pre-production, where the director, cinematographer, and VFX supervisor collaborate on storyboarding and establishing the shot list. The taxidermist ensures the specimen is appropriately prepared and positioned. During filming, the cinematographer carefully lights and frames the shot, paying close attention to detail and ensuring consistency with the surrounding environment (whether real or CGI). Post-production involves editing, color correction, and VFX integration. The VFX artist works to seamlessly blend the taxidermied animal into the CGI environment, addressing issues of lighting, texture, and scale. Finally, the editor assembles the final sequence, ensuring a smooth and believable transition between the real and digital elements. The roles are interdependent, and clear communication is essential for a successful outcome.
Creating a Believable Sense of Scale and Depth
Creating a believable sense of scale and depth when filming taxidermied animals requires careful consideration of several factors. The use of forced perspective, where objects are placed strategically to create the illusion of depth, is a common technique. For instance, placing smaller objects in the foreground and larger objects in the background can enhance the sense of scale. The use of shallow depth of field, where only a portion of the image is in sharp focus, can also draw attention to the taxidermied animal and create a sense of depth. Additionally, incorporating environmental elements such as trees, rocks, and other natural features can help to ground the animal in its surroundings and establish a sense of scale. The strategic use of lighting can further enhance depth perception; light and shadow can be used to create a sense of volume and three-dimensionality. For example, a taxidermied bird positioned against a blurred background of a forest would effectively demonstrate its size relative to the environment.
- High-Key Lighting: Creates a bright, even illumination, minimizing shadows and emphasizing the texture of the specimen.
- Low-Key Lighting: Uses strong contrasts between light and shadow, creating a dramatic and mysterious mood.
- Side Lighting: Highlights the form and texture of the specimen by casting shadows on one side.
- Back Lighting: Creates a silhouette effect, emphasizing the Artikel of the specimen and adding depth.
- Rim Lighting: Illuminates the edges of the specimen, separating it from the background and enhancing its three-dimensionality.
Ending Remarks
Mastering the art of taxidermy for wildlife filmmaking requires a unique blend of artistic skill, technical expertise, and ethical awareness. This process, as we’ve explored, extends far beyond mere preservation; it’s about creating believable and compelling narratives that inform and engage audiences. By understanding the intricacies of preservation techniques, camera angles, lighting, and visual effects integration, filmmakers can elevate their wildlife documentaries to new levels of realism and emotional impact. The ethical considerations, however, remain paramount, demanding responsible and thoughtful approaches throughout the entire production process.