Embark on a journey into the fascinating world of taxidermy with this beginner-friendly guide. We’ll demystify the process, offering a step-by-step approach to preserving small animals. Learn to select appropriate specimens, master essential techniques like skinning and tanning, and create stunning displays for your finished projects. This guide provides a practical and accessible introduction to this unique craft, perfect for those eager to explore the art of taxidermy.
From selecting your first animal to constructing a display case, we’ll cover all the crucial aspects. This guide focuses on simplicity and clarity, ensuring a smooth learning curve for aspiring taxidermists. You’ll find detailed instructions, helpful tips, and resources to further your skills. Get ready to transform your passion for wildlife into beautiful, lasting memories.
Selecting Your First Taxidermy Project

Embarking on your taxidermy journey requires careful consideration of your first project. Choosing a small and simple animal will allow you to learn fundamental techniques without being overwhelmed by complex anatomy or extensive preparation time. This initial experience will build your confidence and provide a solid foundation for more ambitious projects in the future. The key is to select an animal that is readily available, easy to handle, and forgiving of minor mistakes.
Suitable Animals for Beginner Taxidermists
Selecting the right animal is crucial for a successful first taxidermy project. The following table Artikels three excellent choices, considering their availability, ease of preparation, and suitability for beginners.
| Animal | Source | Preparation Difficulty | Reasons for Selection |
|---|---|---|---|
| Squirrel | Trapping (with necessary permits), roadkill (check local regulations) | Easy | Relatively small size, readily available in many regions, simple anatomy. |
| Rabbit (small breed) | Breeding farms (check regulations), roadkill (check local regulations) | Easy to Medium | Larger than a squirrel, offering more practice with larger skin areas, readily available in some areas. |
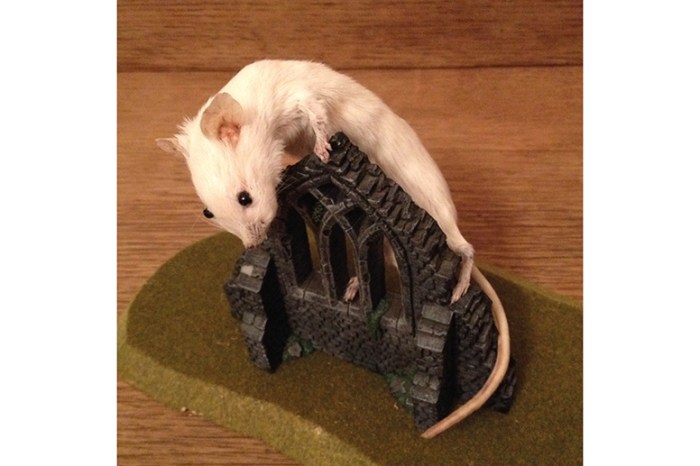
| Rat (or similar small rodent) | Pet stores (deceased pets only), pest control companies (with permission) | Easy | Very small size, minimal tools needed, excellent for practicing precise techniques. |
Necessary Tools and Supplies
The tools and supplies required will vary slightly depending on the chosen animal, but a basic kit will suffice for all three. For squirrels and rabbits, you’ll need sharp scalpels or scissors for skinning, fleshing tools (a fleshing knife or beam), a tanning solution (commercial or homemade), borax or other drying agent, cotton or other stuffing material, and sewing needles and thread. For rats, the tools can be scaled down, possibly using smaller scissors and a smaller fleshing tool. Eye protection and gloves are essential for all projects to protect both the animal and the taxidermist.
Preparing a Squirrel Skin: A Step-by-Step Guide
This guide details the process of preparing a squirrel skin, focusing on cleaning and fleshing techniques. Remember to always follow ethical and legal guidelines regarding animal acquisition and handling.
- Preparation: Ensure the squirrel is thoroughly frozen before starting. This helps firm the tissues, making the process easier.
- Skinning: Begin by making an incision along the belly from the groin to the chin. Carefully separate the skin from the flesh using your scalpel or scissors, working your way around the legs and tail. Take your time and be careful not to tear the skin.
- Fleshing: Once the skin is removed, use your fleshing tool to carefully scrape away all remaining muscle tissue, fat, and membrane. This is a crucial step to prevent decay and ensure proper preservation. Work methodically, checking for any remaining tissue. Pay close attention to areas around the legs, tail, and head.
- Cleaning: Thoroughly wash the skin with a mild detergent solution and rinse with clean water. This removes any residual blood or debris. Allow the skin to dry completely.
- Tanning: Apply your chosen tanning solution according to the manufacturer’s instructions. This preserves the skin and makes it supple and durable.
- Drying: After tanning, allow the skin to dry completely, ideally using a drying agent like borax to absorb moisture and prevent mold.
Essential Taxidermy Techniques
Mastering taxidermy involves a series of crucial techniques, each requiring precision and patience. This section will delve into the essential steps of skinning, tanning, and mounting a small mammal, providing a foundational understanding for your taxidermy journey. Proper technique is paramount to preserving the animal’s natural beauty and creating a lasting piece of art.
Skinning a Small Mammal
Careful skinning is the first critical step in taxidermy. Damaging the hide will irrevocably ruin your project. The following steps, performed with sharp, fine-bladed tools, will ensure a clean and successful skinning process.
- Preparation: Begin by carefully examining your specimen. Note the location of any external markings or unique features you wish to preserve. Use sharp, fine-bladed scissors or a scalpel to make a small incision along the belly, starting at the pelvis and extending towards the chin, being careful to avoid cutting the hide.
- Separating the Skin: Gently work your fingers between the skin and the muscle, carefully separating the two layers. Use the blunt end of your scalpel or a similar tool to aid in this process, ensuring you avoid tearing the skin. Work slowly and methodically, paying particular attention around the legs and head.
- Removing the Limbs: Once the skin is sufficiently loosened, carefully cut through the muscle tissue at the joints of the legs, separating them from the body. Be mindful to leave as much flesh as possible attached to the carcass. The goal is to leave the skin intact.
- Head and Neck: Carefully work the skin over the head, taking extra care around the eyes, ears, and mouth. These areas are delicate and prone to tearing. A small, sharp tool is beneficial for this process.
- Cleaning and Fleshing: Once the skin is completely removed, carefully clean away any remaining flesh and fat using a fleshing knife. Ensure all residual tissue is removed to prevent decay and damage.
- Turning the Skin: Carefully turn the skin inside out. This allows for thorough cleaning and tanning. Again, work slowly and gently.
Tanning Methods for Beginners
Tanning is the process of preserving the skin, preventing decay and making it pliable. Several methods exist, each with its own pros and cons. For beginners, two methods stand out due to their relative simplicity and accessibility.
- Salt Cure: This is a straightforward method involving covering the fleshed skin with a generous layer of non-iodized salt. The salt draws out moisture, preventing bacterial growth. It’s simple and effective but requires a longer curing time and can result in a slightly stiffer hide compared to other methods.
- Commercial Tanning Kits: These kits provide all the necessary chemicals and instructions for a relatively quick and easy tanning process. They offer convenience and often yield softer, more pliable hides. However, they can be more expensive than the salt cure method.
Mounting a Small Animal on a Manikin
Once the skin is tanned, it’s time for mounting. This involves carefully stretching the skin over a manikin, a form that replicates the animal’s skeletal structure.
The manikin should be appropriately sized for the animal. Begin by carefully positioning the tanned skin over the manikin’s head, ensuring that the features such as the ears and eyes are correctly aligned. Gently pull the skin over the body, ensuring it is evenly distributed and there are no wrinkles or bunching. Use taxidermy needles and thread to carefully stitch the skin together along the underside of the animal. Ensure the stitches are small and inconspicuous. Once the skin is securely attached to the manikin, carefully sculpt the animal’s form, paying attention to its natural posture and musculature. Use cotton or other stuffing material to add volume and create a lifelike appearance. Finally, apply artificial eyes to complete the mount. The finished product should resemble the natural form of the animal as closely as possible.
Displaying Your Finished Taxidermy Project

Presenting your completed taxidermy project is the culmination of your hard work and skill. A well-executed display not only showcases the animal but also elevates the overall aesthetic appeal. Careful consideration of both the display case and long-term preservation techniques is crucial to ensure your piece remains a treasured item for years to come.
Building a Simple Display Case
Constructing a basic display case for a small taxidermied animal can be a straightforward process. The following materials and steps Artikel the creation of a clear, protective enclosure. This example uses a small mammal as the subject, but the principles can be adapted for other small specimens. Remember to always prioritize safety and handle your specimen with care.
Materials Needed:
- A clear glass or acrylic box (available at craft stores or online retailers; size should accommodate the animal plus a small amount of space).
- A small piece of foam or soft padding (to cushion the animal and prevent movement).
- Optional: A small amount of artificial moss or other decorative elements (for added visual interest).
Step-by-Step Instructions:
- Clean the display box thoroughly to remove any dust or debris.
- Carefully place the foam padding inside the box, ensuring it provides adequate support for the taxidermied animal. The padding should cradle the animal gently without causing pressure points.
- Position the taxidermied animal in the center of the box. Adjust the padding as needed to achieve the desired pose and stability.
- If using decorative elements, add them carefully around the animal, ensuring they do not obstruct the view or damage the specimen.
- Securely close the display box. Consider adding a small amount of desiccant (like silica gel packets) to absorb any excess moisture within the case to help prevent mold or mildew.
Long-Term Preservation of Taxidermied Specimens
Proper preservation is vital for maintaining the quality and longevity of your taxidermy work. Several factors contribute to the long-term health of your specimen, including environmental conditions and potential threats.
Environmental Factors:
- Temperature and Humidity: Fluctuations in temperature and humidity can cause damage to the specimen. Ideally, store the piece in a cool, dry location with minimal temperature variations. High humidity can promote mold growth, while extreme temperatures can cause the materials to deteriorate. Consistent temperature and humidity are key.
- Light Exposure: Direct sunlight and strong artificial light can fade the colors of the specimen and cause material degradation over time. Keep the display case out of direct sunlight and use diffused lighting if possible.
Potential Threats:
- Pests: Insects, rodents, and other pests can cause significant damage to taxidermied specimens. Keep the display case sealed tightly and store it in a pest-free environment. Consider using mothballs or other pest deterrents (following manufacturer instructions carefully and ensuring safety for your specimen).
- Dust and Debris: Dust accumulation can dull the appearance of the specimen and potentially contribute to deterioration. Regularly clean the exterior of the display case with a soft cloth.
Resources for Continued Learning
There are numerous resources available for those interested in expanding their taxidermy knowledge and skills.
Resources:
- Books: Many books provide detailed instructions and guidance on various aspects of taxidermy. Search online bookstores for titles focusing on specific animal types or techniques.
- Online Communities: Several online forums and communities are dedicated to taxidermy, offering a platform for sharing knowledge, asking questions, and receiving feedback from experienced taxidermists. These communities provide invaluable support and opportunities for learning from others.
- Workshops and Classes: Hands-on workshops and classes offer invaluable practical experience and the opportunity to learn from professionals. Many taxidermy supply companies or local wildlife organizations offer such courses.
Last Point

Preserving wildlife through taxidermy is a rewarding experience, combining artistic skill with scientific precision. This guide has provided a foundational understanding of the process, equipping you with the knowledge and confidence to tackle your first projects. Remember, patience and attention to detail are key. As you gain experience, you can explore more advanced techniques and expand your skillset. Embrace the learning process, enjoy the creative outlet, and celebrate your achievements in preserving nature’s beauty.