Mastering the art of taxidermy requires precision, skill, and the right tools. This guide delves into the eight essential tools every professional taxidermist needs, exploring their unique applications and crucial role in preserving animal specimens with accuracy and respect. From the initial skinning process to the final mounting, understanding the nuances of each tool is paramount for achieving exceptional results.
We’ll examine a range of tools, from the fundamental scalpel and skinning knife to more specialized equipment like fleshing machines and mounting forms. We’ll also discuss proper maintenance, safety precautions, and hygiene practices to ensure both the quality of your work and your personal well-being. This comprehensive overview aims to equip you with the knowledge and understanding necessary to confidently navigate the world of professional taxidermy.
Essential Taxidermy Tools
A well-equipped taxidermist relies on a variety of specialized tools to ensure a high-quality, lifelike final product. Selecting the right tools, understanding their proper use, and implementing regular maintenance are crucial for success in this meticulous craft. This section will delve into the specifics of several essential tools, providing guidance on their selection, use, and care.
Scalpel Selection and Comparison
Choosing the right scalpel is paramount for precise and controlled cuts during the skinning process. Different brands offer varying features, impacting both performance and longevity. The following table compares three popular brands:
| Brand | Price Range | Blade Type | Handle Material |
|---|---|---|---|
| Swann-Morton | $20 – $50 per scalpel | #11, #10, #15 blades (replaceable) | Stainless steel, ergonomic design |
| Kai | $15 – $35 per scalpel | Various replaceable blades available | Lightweight, durable plastic |
| Bard-Parker | $10 – $40 per scalpel | #20, #21, #22 blades (replaceable) | Stainless steel, textured grip |
Taxidermy Skinning Knife Maintenance and Sharpening
Proper maintenance is key to extending the life and effectiveness of your skinning knife. Regular cleaning after each use, using a mild soap and water solution, prevents the build-up of organic material that can dull the blade and promote rust. Thorough drying is crucial to prevent corrosion. Sharpening should be performed using a high-quality honing steel or sharpening stone. The angle of the blade should be maintained consistently throughout the sharpening process, typically around 20-25 degrees. A stropping process after sharpening further refines the edge, resulting in a smoother, more precise cut.
Using Taxidermy Scissors for Delicate Cuts
Taxidermy scissors, particularly those with fine, pointed tips, are invaluable for precise cuts around delicate areas like eyelids, lips, and ears. To ensure clean cuts, hold the scissors firmly but gently, using a controlled cutting motion. Avoid forcing the scissors, as this can damage the hide or cause tearing. For particularly sensitive areas, it’s often beneficial to use smaller, more precise snips rather than one long cut. Always keep the blades sharp to prevent unnecessary stress on the hide. Begin by making small, shallow incisions to gauge the positioning before committing to a longer cut. This technique allows for better control and minimizes the risk of accidental damage.
Taxidermy Needle Types and Applications
Different taxidermy needles cater to specific needs, depending on the thickness of the hide and the type of thread used. An infographic illustrating these would show:
(Image description: The infographic would feature four different types of needles. The first would be a Heavy-Duty Needle, depicted as a large, thick needle with a large eye, captioned “Used for thick hides and heavy thread.” The second would be a Standard Needle, a medium-sized needle with a medium-sized eye, captioned “Most commonly used for a wide variety of applications.” The third would be a Fine Needle, a small, thin needle with a small eye, captioned “Used for delicate work and fine thread on thin hides.” The fourth would be a Curved Needle, a needle with a curved shaft and medium-sized eye, captioned “Ideal for reaching difficult areas during the sewing process.”)
Advanced Taxidermy Tools and Their Applications

Moving beyond the essential tools, advanced taxidermy equipment significantly enhances efficiency, precision, and the overall quality of the finished piece. This section will explore some of these advanced tools and their specific applications, highlighting the advantages they offer over more basic methods.
Fleshing Machine Efficiency and Precision
The use of a fleshing machine offers substantial improvements over manual fleshing tools. Manual fleshing, while requiring skill and patience, is a time-consuming process prone to inconsistencies. A fleshing machine, on the other hand, utilizes a rotating drum with blades to quickly and efficiently remove fat and tissue from the hide. This results in a cleaner, more evenly fleshed hide, crucial for preventing slippage and ensuring the proper adhesion of the tanned hide to the mounting form. The consistent pressure and speed of the machine minimize the risk of damaging the hide, leading to a superior final product. The time saved is particularly significant when working with larger animals. For example, fleshing a deer hide manually could take several hours, whereas a fleshing machine can complete the task in a fraction of the time.
Tanning Solution versus Natural Preservation Methods
The choice between a tanning solution and natural preservation methods depends on several factors, including the type of animal, the desired aesthetic, and the available resources. Tanning solutions, typically based on chromium salts, are effective at preserving the hide, making it supple and resistant to decay. This method is relatively quick and produces consistent results, ideal for commercial taxidermists. However, some taxidermists prefer natural methods such as brain tanning or smoke tanning, believing these approaches result in a more natural look and feel. These methods, however, are more time-consuming and require specialized knowledge and experience to achieve satisfactory results. The use of a tanning solution can potentially lead to issues with the long-term stability of the hide if not properly applied, while natural methods can be inconsistent in their results, leading to variations in hide quality.
Taxidermy Mounting Form Selection and Use
Selecting the appropriate taxidermy mounting form is paramount to creating a lifelike and accurate representation of the animal. The form should accurately match the species, sex, and size of the animal being mounted. Measurements such as body length, shoulder height, and head size are critical considerations. Incorrect form selection can lead to a disproportionate and unnatural-looking mount. Once the correct form is chosen, the process involves carefully fitting the tanned hide over the form, ensuring proper alignment and tension. This requires patience and attention to detail to avoid wrinkles or distortions. Specialized tools, such as form clamps and sewing needles, aid in securing the hide and creating a seamless finish. For instance, a correctly sized form for a whitetail deer buck will allow for a natural posture and accurate representation of the animal’s musculature, whereas an improperly sized form would result in an unnatural appearance.
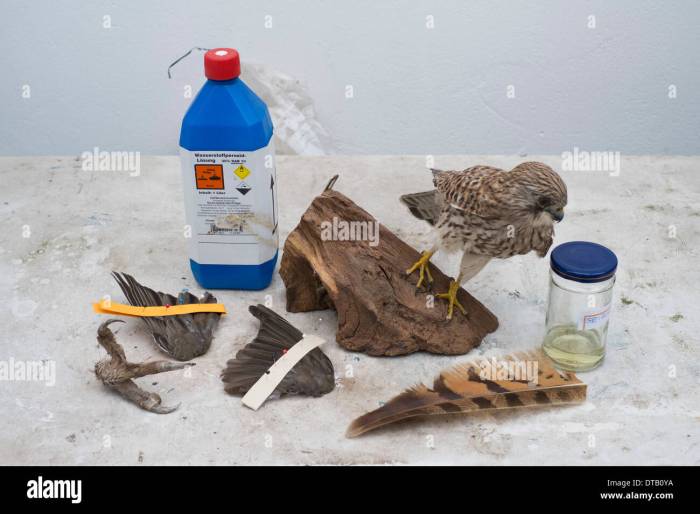
Specialized Tools for Bird Taxidermy
Bird taxidermy requires a specialized set of tools, differing significantly from those used for mammal taxidermy. The smaller scale of birds necessitates finer instruments. This includes miniature fleshing tools, specialized sewing needles with smaller eyes, and smaller mounting forms. Other essential tools include fine-tipped forceps for precise manipulation of delicate tissues and small scissors for trimming feathers. Additionally, specialized eye inserts and feather shaping tools are frequently employed. The delicate nature of bird anatomy necessitates more precise and gentler handling than mammal taxidermy. For example, the use of a fine-tipped brush is crucial for cleaning and preserving delicate feathers. In contrast, mammal taxidermy might utilize coarser tools given the more robust nature of the hides and tissues.
Safety and Hygiene in Taxidermy

Maintaining a safe and hygienic workspace is paramount in taxidermy. The handling of sharp tools, potentially hazardous chemicals, and biological materials necessitates a rigorous approach to safety and sanitation to prevent accidents and the spread of disease. Using high-quality, durable tools is the first step in mitigating risk, as poorly made tools are more prone to breakage and malfunction, leading to injuries. Similarly, consistent cleaning and sterilization procedures are essential for preventing cross-contamination between specimens and protecting the taxidermist’s health.
Proper cleaning and sterilization techniques are crucial for maintaining hygiene and preventing cross-contamination in taxidermy. Failing to properly clean and sterilize tools can lead to the spread of bacteria and viruses, potentially damaging specimens or causing illness in the taxidermist. The process should be thorough and consistent, utilizing appropriate disinfectants and sterilization methods.
Tool Selection and Durability
High-quality, durable tools are essential for safe and accurate taxidermy work. Investing in well-made instruments minimizes the risk of accidental injury from breakage or slippage. For example, a poorly constructed scalpel is more likely to break during use, potentially causing a serious cut. Similarly, dull or poorly designed forceps can slip, damaging the specimen or injuring the taxidermist. Durable tools, made from robust materials like stainless steel, are less prone to damage and offer greater precision, contributing to a safer and more efficient workflow. The increased longevity of high-quality tools also reduces the overall cost over time.
Cleaning and Sterilization Techniques
Cleaning and sterilizing taxidermy tools is a critical step in preventing cross-contamination and maintaining hygiene. After each use, tools should be thoroughly cleaned to remove any organic material. This typically involves scrubbing with warm soapy water, followed by rinsing with clean water. For more thorough cleaning, an ultrasonic cleaner can be employed. Following cleaning, tools should be sterilized to eliminate any remaining bacteria or viruses. Effective sterilization methods include autoclaving, boiling, or using a chemical disinfectant such as a diluted bleach solution (following manufacturer’s instructions carefully). Proper drying after cleaning and sterilization is crucial to prevent rust and corrosion.
Potential Hazards and Preventative Measures
Several potential hazards are associated with taxidermy tools. Sharp instruments like scalpels and knives pose a risk of cuts and lacerations. Preventative measures include using sharp, well-maintained tools, employing proper cutting techniques, and always wearing cut-resistant gloves. Forceps and other gripping tools can cause pinching injuries if not handled carefully. Using appropriate techniques and paying close attention to hand positioning minimizes this risk. Electric tools like rotary tools and drills present electrical hazards. Ensuring proper grounding and using tools in good working order is essential. Additionally, proper ventilation should be maintained when using chemicals like tanning solutions, which can produce harmful fumes.
Safety Precautions Checklist
Before commencing any taxidermy work, a thorough safety checklist should be followed. This checklist should include the use of appropriate personal protective equipment (PPE) and safe handling practices for each tool.
The following is a sample checklist for the eight essential taxidermy tools (assuming these have been previously defined in the document):
| Tool | Safety Precautions | PPE |
|---|---|---|
| Scalpel | Use sharp blade, proper cutting technique, avoid excessive force. | Cut-resistant gloves, eye protection |
| Scissors | Handle carefully, keep blades sharp, avoid unnecessary force. | Cut-resistant gloves |
| Forceps | Use appropriate grip, avoid pinching skin. | Gloves |
| Needles | Use with caution, avoid accidental puncture. | Gloves |
| Brushes | Clean thoroughly after each use. | Gloves (depending on material being handled) |
| Measuring tools | Handle carefully to avoid damage. | None typically needed |
| Sewing tools | Use with care, avoid accidental puncture. | Gloves |
| Bone saw (if used) | Use in a well-ventilated area, use appropriate blade, avoid excessive force. | Gloves, eye protection, dust mask |
Epilogue

Creating accurate and lifelike taxidermy mounts demands proficiency with a variety of specialized tools. This guide has highlighted eight essential items, emphasizing their unique applications and the importance of proper maintenance and safety. By understanding the intricacies of each tool and adhering to best practices, taxidermists can elevate their craft, producing stunning and ethically sound representations of the animal kingdom. Investing in high-quality tools and mastering their use is an investment in the longevity and success of your taxidermy career.