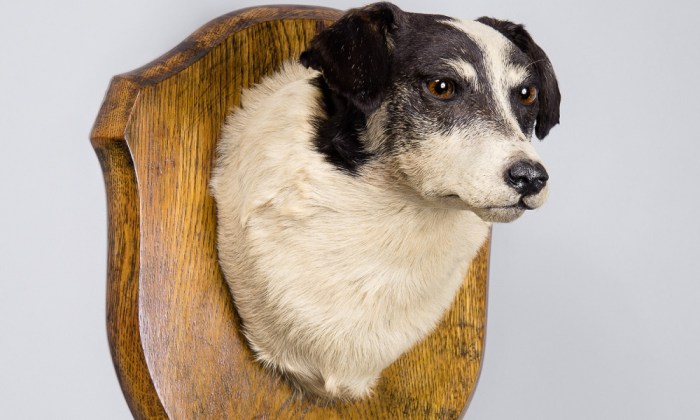
Preserving the beauty and majesty of a mammal through taxidermy is a skill requiring precision, patience, and a deep respect for the animal. This comprehensive guide details seven essential steps, from ethical euthanasia and initial preparation to the final mounting, ensuring a respectful and accurate representation of the creature. We’ll explore various techniques, tools, and crucial considerations to help you navigate this intricate process successfully.
From selecting the appropriate tanning methods and creating a realistic manikin to the delicate art of sewing the hide, each step is meticulously explained. We will address common pitfalls and offer solutions to achieve a final product that is both aesthetically pleasing and scientifically accurate. This guide provides a balanced approach, emphasizing ethical treatment alongside the practical aspects of taxidermy.
Preparing the Mammal for Taxidermy

Preparing a mammal for taxidermy requires careful consideration of ethical practices and precise techniques. The process begins long before the actual skinning and mounting, starting with the humane euthanasia of the animal, if it wasn’t already deceased under natural causes. Subsequent steps involve careful preservation of the hide and the accurate measurement and preparation of the body for the creation of a taxidermied form.
Humane Euthanasia and Initial Preparation
Ethical considerations are paramount. If you are obtaining a mammal for taxidermy, it is crucial to ensure that euthanasia, if necessary, is performed humanely by a qualified professional, such as a veterinarian. This minimizes suffering and ensures a respectful approach to the animal. Improper methods are both inhumane and can damage the hide, compromising the final taxidermy result. Following euthanasia, the animal should be immediately cooled to slow down decomposition. This is typically achieved by placing the animal in a cool, shaded area or refrigerator. The time between death and beginning the skinning process is crucial for preserving the quality of the hide and minimizing deterioration. Rapid cooling helps to reduce the risk of tissue damage and prevents the growth of bacteria. Before starting the skinning process, it is important to take accurate measurements of the animal, noting its length, girth, and other key features. These measurements will be crucial for creating an accurate form later in the process.
Mammal Skinning Techniques
Several techniques exist for skinning mammals, each with its own advantages and disadvantages. The choice of method often depends on the size and species of the animal, as well as the taxidermist’s experience and preference.
The “Game Head” Skinning Method: This method involves making an incision along the belly, from the chest to the anus. The skin is then carefully peeled back from the body, starting at the legs and working towards the head. This method is suitable for smaller animals and those with relatively thin hides. Its advantage lies in its simplicity and speed, making it efficient for quick processing. However, it’s less precise and increases the risk of damaging the hide, especially in larger animals with thicker hides.
The “Back Skinning” Method: This method involves making an incision down the back of the animal, from the base of the tail to the neck. The skin is then carefully peeled away from the body, working from the back towards the belly. This method is often preferred for larger animals and those with thick hides. The back skinning technique offers better control and reduces the risk of damaging the hide, but it is more time-consuming and requires more skill. It’s particularly useful for preserving the quality of the hide in large mammals.
The “Cape Skinning” Method: This method, frequently used for large game animals, focuses on removing the hide from the head and shoulders (the “cape”) first, then working down the body. This method minimizes damage to the hide, especially in areas like the neck and shoulders, and is ideal for preserving the integrity of the trophy head. It demands a high level of skill and precision and can be more time-consuming.
Tools for Skinning Mammals of Different Sizes
The tools required for skinning vary depending on the size of the mammal. Having the right tools ensures a smooth and efficient process, minimizing the risk of damage to the hide.
| Tool | Small Mammal (e.g., Squirrel) | Medium Mammal (e.g., Fox) | Large Mammal (e.g., Deer) |
|---|---|---|---|
| Sharp Scalpel or Knife | Small, sharp scalpel | Medium-sized scalpel or sharp hunting knife | Large, heavy-duty skinning knife |
| Scissors | Small, sharp scissors | Medium-sized scissors | Large, heavy-duty shears |
| Fleshing Knife | Small fleshing knife | Medium-sized fleshing knife | Large fleshing knife |
| Hook | Small skinning hook | Medium skinning hook | Large skinning hook |
| Gloves | Nitrile gloves | Nitrile gloves | Heavy-duty work gloves |
Tanning and Preserving the Hide

Proper tanning and preservation are crucial for maintaining the hide’s integrity and preventing decay, ensuring your taxidermied mammal remains a lasting tribute. The choice of tanning method depends on factors such as the size of the hide, the desired final appearance, and the available resources. Each method offers a unique balance of effectiveness, cost, and complexity.
Tanning transforms the hide from a perishable material into a durable, lasting one. This process involves breaking down the proteins that make the hide susceptible to decay, replacing them with compounds that prevent decomposition and render the hide flexible and pliable. Proper salting and drying are critical preparatory steps before the actual tanning process. Neglecting these steps can lead to hair slippage, putrefaction, and ultimately, a ruined specimen.
Tanning Methods for Mammal Hides
Several tanning methods exist, each with its own advantages and disadvantages. Choosing the right method requires consideration of the animal’s size, the desired outcome, and your experience level.
Common methods include:
- Chrome Tanning: This is a popular commercial method using chromium salts. It’s relatively quick, produces a soft, supple hide, and is suitable for most mammals. However, it requires specialized chemicals and can be harmful if not handled correctly. The resulting hide is also susceptible to damage from prolonged exposure to direct sunlight.
- Brain Tanning: This traditional method utilizes the animal’s own brain matter as a source of fat and enzymes. It’s environmentally friendly and produces a very soft, durable hide, but it’s time-consuming and labor-intensive, requiring significant patience and skill. It’s best suited for smaller hides.
- Alum Tanning: Alum, a naturally occurring mineral salt, is used in this method. It’s relatively simple and safer than chrome tanning, producing a firm, less supple hide. It’s a good option for beginners but results in a less flexible final product compared to chrome tanning.
Salting and Drying a Mammal Hide
Proper salting and drying are essential steps before tanning. This prevents bacterial growth and decomposition, preserving the hide’s quality.
- Fleshing: Carefully remove all remaining flesh and fat from the hide. Use a fleshing knife or similar tool, taking care not to damage the skin.
- Salting: Liberally cover the flesh side of the hide with non-iodized salt. Ensure the salt penetrates all areas, particularly thick parts. Allow the hide to salt for several days, turning it regularly to promote even salting.
- Washing: After several days, rinse the hide thoroughly with cool water to remove excess salt. This is crucial to prevent salt damage during tanning.
- Drying: Stretch the hide over a smooth, clean surface, ensuring it’s taut. Allow it to air dry completely, away from direct sunlight and heat. Proper drying is crucial to prevent shrinkage and damage.
Neutralizing the Hide After Tanning
After tanning, it’s vital to neutralize the hide. This step removes residual tanning chemicals, preventing damage to the hide and ensuring long-term preservation. The specific neutralization process varies depending on the tanning method used. For chrome tanning, a specific neutralizing solution is typically used, while brain tanning may only require a thorough rinsing. Failure to neutralize can lead to hide degradation and discoloration over time, compromising the final taxidermy mount.
Forming the Mammal’s Body and Mounting

Creating the manikin, the artificial form onto which the tanned hide will be fitted, is a crucial step in taxidermy. A well-made manikin ensures the final mount accurately reflects the animal’s natural form and posture. The choice of materials and techniques depends largely on the size and species of the mammal.
The process of manikin creation involves careful consideration of the animal’s skeletal structure and musculature. For smaller mammals, readily available materials like foam, clay, or even wood can be used to sculpt a basic form. Larger mammals often require more robust materials and techniques. For instance, a large deer might require a manikin constructed from a wire armature covered in foam, ensuring both strength and flexibility to achieve the desired pose. Precise measurements from the animal’s carcass are essential for creating an accurate representation. The manikin should mimic the animal’s underlying structure, including the subtle curves and contours of its body.
Manikin Construction Techniques
Manikin construction is tailored to the specific animal. For a small rodent, a simple carved block of foam might suffice, carefully shaped to reflect the animal’s body proportions. Larger animals, however, may need more complex structures. For example, a large canine might require a wire frame foundation, meticulously shaped to mirror the animal’s skeletal structure. This frame is then padded with layers of foam, meticulously sculpted to recreate the muscle definition and contours of the animal’s body. The final layer might be a thin layer of sculpted clay to refine the details and ensure a smooth surface for the hide to adhere to. The entire process requires patience and a keen eye for detail. The goal is to create a realistic and anatomically correct foundation.
Sewing the Hide onto the Manikin
Once the manikin is complete and the hide is tanned and prepared, the process of sewing the hide onto the manikin begins. This is a delicate procedure that requires precision and patience. Begin by carefully aligning the hide with the manikin, ensuring proper placement of features like the ears, eyes, and mouth. Use fine, strong thread that matches the hide’s color as closely as possible. Begin sewing from the underside, working your way up, taking small, even stitches to avoid puckering or stretching the hide. The sewing process needs to be gradual and meticulous, ensuring a snug fit without causing undue tension on the hide. Areas around joints, such as the legs and neck, require special attention to allow for natural movement and flexibility.
Common Mounting Mistakes and Solutions
Avoiding common mistakes during the mounting process is crucial for a successful taxidermy project.
- Improper Manikin Sizing: Using a manikin that is too large or too small will result in a distorted final product. Solution: Take precise measurements of the animal’s carcass before beginning manikin construction.
- Uneven Hide Tension: Uneven tension on the hide during sewing will lead to unnatural wrinkles and distortions. Solution: Work slowly and carefully, ensuring even tension throughout the sewing process.
- Poor Hide Preparation: If the hide is not properly tanned and prepared, it will be difficult to work with and may shrink or crack. Solution: Ensure the hide is properly tanned and conditioned before mounting.
- Incorrect Placement of Features: Misplacing features like eyes or ears will result in an unnatural and unrealistic final product. Solution: Carefully plan the placement of features before beginning the sewing process and use reference photos.
- Using Incorrect Thread: Using a thick or inappropriate colored thread will be visible in the final product. Solution: Use thin, strong thread that matches the hide’s color.
Epilogue
Mastering the art of mammal taxidermy requires dedication and a keen eye for detail. By following these seven essential steps and understanding the nuances of each process, you can create a lasting tribute to the animal. Remember, ethical considerations are paramount throughout, ensuring a respectful and accurate representation of the creature’s natural form. With practice and patience, you can achieve stunning results, preserving the memory of the animal for generations to come. The rewards of this meticulous craft are both personally fulfilling and a testament to the beauty of the natural world.