Mastering Bird Taxidermy: 10 Advanced Techniques delves into the intricate art of preserving avian specimens, moving beyond basic methods to explore advanced techniques for skinning, preservation, and mounting. This guide provides detailed instructions and insightful comparisons of traditional and modern approaches, ensuring a comprehensive understanding for both aspiring and experienced taxidermists.
From the delicate handling of hummingbirds to the robust preparation of larger raptors, the guide offers species-specific advice and showcases the importance of precision and minimizing damage to feathers and skin. The detailed steps, accompanied by visual aids (though not provided here), will equip readers with the skills to create lifelike and museum-quality displays.
Advanced Skinning Techniques in Bird Taxidermy

Proper skinning is paramount in bird taxidermy, ensuring the preservation of delicate feathers and the creation of a lifelike mount. This process varies significantly depending on the bird’s size and plumage type, requiring precision and specialized tools. Mastering these techniques elevates the quality of your work dramatically.
Skinning Techniques for Different Bird Sizes and Plumage
The approach to skinning a bird changes considerably based on its size and feather type. Smaller birds, with their delicate structures, require a more gentle touch than larger species. Similarly, birds with dense, tightly packed plumage demand different techniques than those with looser feathers. The following table Artikels a comparative approach:
| Bird Size | Plumage Type | Skinning Technique | Image Description |
|---|---|---|---|
| Small (e.g., hummingbird) | Dense, iridescent | Use a very fine scalpel or dissecting scissors for the initial incision. Work slowly and carefully around the legs and wings, avoiding tearing. Pay close attention to the delicate skin around the eyes and beak. Remove the skin in one piece. | Imagine a detailed close-up showing the tiny incision made behind the beak of a hummingbird. The fine scalpel is visible, and the surrounding iridescent feathers are undisturbed. The image highlights the meticulous care needed for such small birds. |
| Medium (e.g., robin) | Loose, less dense | A slightly larger incision can be made, but still behind the beak. The skin can be carefully peeled back using blunt-ended tools, such as a small bone scraper or a dull knife. Special attention should be paid to the wings, where the skin is thinner and more easily torn. | The image shows a robin with a small incision behind its beak. The skin is being gently peeled back, revealing the underlying muscle tissue. The image emphasizes the careful, controlled movement of the taxidermist’s hands. |
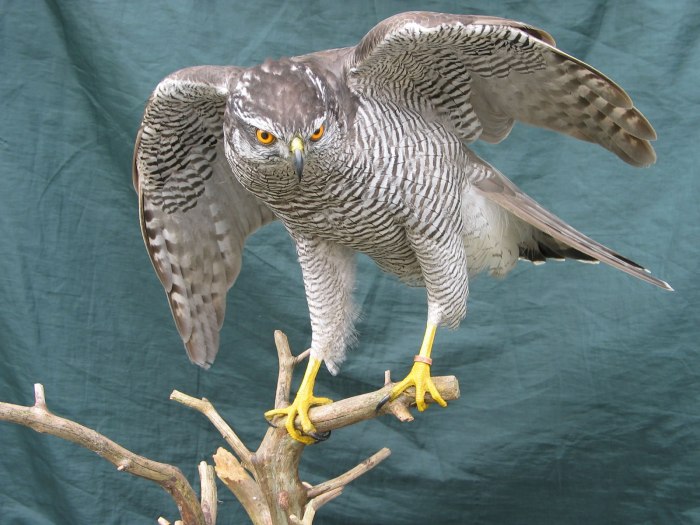
| Large (e.g., owl) | Dense, varied | Larger incisions are necessary, but still strategically placed. The use of a larger scalpel or even a small, sharp knife may be appropriate. Pay close attention to the wing and leg joints, working carefully to separate the skin from the muscle and bone. For larger birds, a more aggressive approach may be needed, but always with precision. | The image shows a larger incision behind the beak of an owl. The taxidermist uses a scalpel to carefully separate the skin from the underlying tissue. The image emphasizes the controlled use of the scalpel and the focus on precise cuts. |
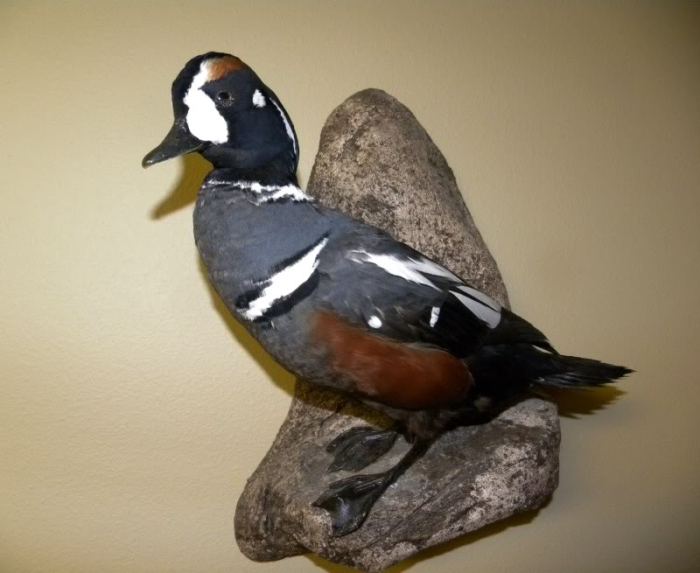
| Waterfowl (e.g., duck) | Water-resistant, dense | Special attention must be paid to the waterproofing layer of the skin. Use a sharp scalpel to make a precise incision, avoiding unnecessary tearing. The skin is often more difficult to separate from the underlying tissue, requiring careful and controlled use of blunt-ended tools. | The image displays the detailed skinning of a duck, highlighting the careful separation of the waterproof outer layer from the underlying tissues. The image shows the tools used, emphasizing their precision and the controlled movements of the taxidermist. |
Traditional versus Less Invasive Skinning Methods
Traditional skinning methods often involve a larger initial incision, which can potentially damage feathers and skin. Newer, less invasive techniques prioritize smaller, more strategic incisions and the use of specialized tools to minimize damage.
Traditional methods typically involve a long incision down the breast, exposing the internal organs. This method is effective but increases the risk of feather damage. Less invasive techniques emphasize smaller incisions, usually behind the beak and along the legs, allowing for careful peeling of the skin. These techniques minimize damage and result in a more pristine final product.
Importance of Incision Placement and Specialized Tools
Proper incision placement is critical. Incisions should be made in areas where feather damage is minimized. For example, an incision behind the beak allows access to the body cavity while avoiding damage to the most visible feathers. Specialized tools, such as fine-tipped scalpels, dissecting scissors, and blunt-ended bone scrapers, are essential for minimizing damage to delicate skin and feathers. These tools allow for precise and controlled manipulation during the skinning process, reducing the risk of tearing and improving the overall quality of the mount.
Preservation and Mounting Methods for Different Bird Types
Proper preservation and mounting techniques are crucial for creating high-quality taxidermy specimens that accurately represent the bird’s natural form and beauty. The methods employed vary significantly depending on the bird’s size, plumage type, and species-specific characteristics. Careful consideration of these factors is essential to ensure the longevity and aesthetic appeal of the finished piece.
Preservation Methods for Various Bird Types
The initial preservation of a bird specimen involves careful skinning and cleaning, followed by appropriate treatment to prevent decomposition and maintain the integrity of the feathers. The methods employed often differ based on the size and type of bird.
- Small Birds (e.g., hummingbirds, warblers): These birds require delicate handling due to their small size and fragile bones. The process involves careful skinning, removal of excess fat and tissue, and thorough cleaning of the skull. A small amount of preservative, such as borax or arsenical soap, is typically applied to the skin.
- Medium-Sized Birds (e.g., songbirds, woodpeckers): Similar to small birds, these require careful attention to detail during skinning. However, the larger size allows for more robust handling. The use of preservative is generally similar to that of small birds, with the quantity adjusted to the size of the specimen.
- Large Birds (e.g., waterfowl, raptors): Larger birds require more significant preparation. This includes thorough cleaning of the internal cavities, removal of excess muscle and fat, and potentially the use of more substantial amounts of preservative. The larger size also demands more attention to preventing damage to the plumage during the skinning process.
Mounting Birds of Different Sizes
Mounting techniques also vary depending on the size of the bird. The process involves shaping the body form, attaching the skin to an artificial body, and posing the bird in a natural and aesthetically pleasing manner.
- Hummingbirds: These tiny birds require specialized miniature forms and meticulous attention to detail. The delicate plumage necessitates extremely gentle handling throughout the entire process. Often, specialized mounting materials and techniques are used to create an accurate and lifelike representation.
- Small to Medium-Sized Birds: These birds are typically mounted using commercially available forms that are appropriately sized. The process involves carefully stretching the skin over the form, ensuring proper feather alignment, and securing the skin with stitches or pins.
- Large Birds: Larger birds, such as raptors and waterfowl, often require custom-made forms or significant modification of commercially available ones. The process is more involved, requiring more time and attention to detail to accurately replicate the bird’s musculature and posture. Additional support structures may be needed to maintain the pose.
Optimal Mounting Techniques for Different Bird Species
The choice of mounting technique is heavily influenced by the bird’s species and its natural posture and behavior. The following table summarizes some optimal techniques:
| Species Type | Optimal Pose | Display Method | Materials Needed |
|---|---|---|---|
| Hummingbird | Hovering or perched on a small branch | Open display case | Miniature form, fine wire, adhesive, display base |
| Songbird | Perched on a branch, singing or foraging | Open display case or shadow box | Standard-sized form, wire, cotton, adhesive, branch, display base |
| Waterfowl | Swimming, preening, or landing | Open display case or diorama | Large form, wire armature, cotton, adhesive, water-resistant materials (for swimming poses), display base |
| Raptor | Perched, hunting, or in flight (more advanced) | Open display case or diorama | Large form, wire armature, cotton, adhesive, realistic eye inserts, perches, display base |
Advanced Feather Manipulation and Restoration

Careful feather manipulation and restoration are crucial for achieving a lifelike and aesthetically pleasing finished product in bird taxidermy. Damage incurred during the collection and preparation process can significantly detract from the final presentation. The following techniques address common issues and provide solutions for restoring damaged plumage to its former glory.
Repairing Damaged Feathers
Damaged feathers often require a multi-step approach. The severity of the damage dictates the appropriate repair method. Minor imperfections can be addressed with careful cleaning and straightening, while more extensive damage might necessitate feather replacement.
- Cleaning: Gently clean soiled feathers using a soft brush and a mild detergent solution. Avoid harsh chemicals that could damage the feather structure. Rinse thoroughly with distilled water and allow to air dry completely. For particularly stubborn stains, consider using a specialized feather cleaning solution available from taxidermy supply stores.
- Straightening: Bent or broken barbs can often be carefully straightened using fine-tipped tweezers or a specialized feather straightening tool. Work slowly and gently to avoid further damage. For severely damaged barbs, consider using a very fine-tipped adhesive to carefully rejoin broken sections.
- Replacing Lost Feathers: Replacing missing feathers requires careful selection of replacement feathers that match the color, texture, and size of the original. These can be sourced from other specimens of the same species (if ethically and legally permissible) or from reputable taxidermy supply companies. Secure the replacement feathers using a high-quality, feather-safe adhesive, ensuring a seamless blend with the surrounding plumage.
Achieving Realistic Feather Texture and Shine
Restoring the natural texture and shine of preserved feathers is essential for creating a realistic representation. This often involves a combination of techniques that address both the individual feather structure and the overall plumage.
The process involves careful attention to detail. Firstly, the feathers must be thoroughly cleaned and dried. Next, a very fine mist of a feather-specific oil (available from taxidermy suppliers) can be applied to restore sheen. This should be done sparingly to avoid creating an oily appearance. Finally, gently brushing the feathers in the direction of their natural growth can help to restore the natural texture and lay. Remember, the goal is to enhance, not overwhelm, the natural beauty of the feathers. Over-application of any product can lead to a dull, unnatural finish.
Positioning and Arranging Feathers During Mounting
Proper feather positioning is paramount in creating a lifelike mount. The wings and tail, in particular, require meticulous attention to detail to ensure a natural pose and aesthetic appeal. Incorrect placement can dramatically alter the bird’s overall appearance, making it look stiff or unnatural.
Consider the bird’s species and typical posture. Wings should be positioned naturally, reflecting the species’ typical resting or flight posture. For example, a raptor might have its wings partially extended, while a songbird might have its wings folded neatly against its body. The tail feathers should be meticulously arranged to follow the natural curve and spread of the tail. Avoid forcing the feathers into unnatural positions. Use small pins or weights to temporarily hold the feathers in place during the mounting process. Imagine a bird in its natural habitat: observe photographs and illustrations of the species to gain an understanding of its typical feather arrangement. The subtle details in feather positioning significantly contribute to the realism of the finished piece. For instance, slightly overlapping wing feathers create a natural, three-dimensional effect, as opposed to rigidly aligned feathers that look artificial. Similarly, the delicate arrangement of tail feathers should convey movement and fluidity, rather than stiffness.
Final Review
By mastering the advanced techniques detailed within this guide, taxidermists can elevate their craft, achieving breathtakingly realistic representations of avian life. The combination of meticulous skinning, precise mounting, and careful feather manipulation results in stunning displays that honor the beauty and intricacy of birds. This comprehensive approach transforms the practice of taxidermy into a true art form, allowing for the preservation and appreciation of these fascinating creatures for generations to come.