Preserving the beauty and intricacies of reptiles through taxidermy requires precision, skill, and a deep respect for these fascinating creatures. This guide delves into the art of reptile taxidermy, offering ten expert tips to help you achieve stunning, lifelike results. From ethical sourcing and safe handling to mastering intricate skinning and mounting techniques, we’ll explore every stage of the process, equipping you with the knowledge to create museum-quality specimens.
We will cover essential tools and materials, various preservation methods suited to different reptile species, and techniques for achieving realistic finishes. Furthermore, we’ll address common pitfalls to avoid, ensuring your finished pieces are both aesthetically pleasing and scientifically accurate, standing as a testament to your skill and dedication.
Preparation and Ethical Considerations
Ethical and safe practices are paramount in reptile taxidermy. Ignoring these crucial aspects not only compromises the integrity of the final piece but also risks harm to the practitioner and disregards the conservation of reptile populations. Proper preparation ensures a high-quality result, while ethical sourcing respects wildlife and contributes to responsible practices.
Ethical Sourcing of Reptile Specimens
Ethical sourcing is the cornerstone of responsible reptile taxidermy. Specimens should originate from legal and sustainable sources, avoiding those obtained through illegal poaching or unsustainable harvesting. This includes verifying permits and licenses, ensuring the specimens are not endangered or protected species, and confirming the legality of their acquisition from reputable breeders, collectors, or researchers. Supporting ethical sources helps protect vulnerable reptile populations and maintains the integrity of the taxidermy profession. Purchasing specimens from sources that cannot provide proper documentation is unethical and potentially illegal.
Safety Precautions When Handling Reptile Specimens
Handling reptile specimens requires careful consideration of safety. Reptiles, even deceased ones, can pose risks. Always wear appropriate personal protective equipment (PPE), including gloves (nitrile or latex), eye protection, and a mask to prevent exposure to potential pathogens or allergens. Proper handling techniques should be employed to avoid injury from sharp scales, teeth, or claws. Thorough disinfection of all tools and surfaces after handling is essential. If working with venomous species, specialized training and enhanced safety protocols are absolutely necessary.
Preparing a Reptile Specimen for Taxidermy
Proper specimen preparation is crucial for achieving a lifelike taxidermy mount. The process begins immediately after the reptile’s death. Initial steps involve carefully measuring and documenting the specimen, taking photographs from various angles, and recording any unique markings or characteristics. The specimen should then be gently cleaned, removing any external debris or parasites. Depending on the size and species, a small incision may be made to allow for proper preservation and the removal of internal organs. This process should be done with precision to avoid damaging the skin. Finally, the specimen is prepared for tanning or other preservation methods.
Essential Tools and Materials for Reptile Taxidermy
A checklist of essential tools and materials is crucial for a successful taxidermy project. This includes: sharp scalpels and dissecting tools, measuring tapes, forceps, needles, thread, tanning solutions (borax, salt, etc.), preservatives (formaldehyde, arsenic, etc. – used with extreme caution and in accordance with regulations), absorbent materials (cotton, sawdust), mounting forms (depending on the species), display cases, and appropriate PPE. The specific tools and materials may vary depending on the size and species of reptile. Proper storage containers for preserved specimens are also essential.
Comparison of Preservation Methods for Reptiles
Different reptile species require varying preservation methods due to differences in skin structure and other biological factors.
| Species | Method | Pros | Cons |
|---|---|---|---|
| Snakes | Tanning with Alum | Relatively simple, good for smaller snakes. | Can be less durable than other methods, may not be suitable for larger snakes. |
| Lizards (e.g., geckos) | Alcohol preservation | Preserves color and detail well, suitable for smaller specimens. | Can cause shrinkage, requires ongoing maintenance. |
| Crocodiles/Alligators | Tanning with chrome salts | Produces durable, long-lasting mounts. | Requires specialized knowledge and equipment, more complex process. |
| Turtles | Combination of tanning and articulation | Preserves both shell and body, creates a lifelike pose. | Requires advanced skills, time-consuming. |
Skinning, Tanning, and Mounting Techniques

Proper skinning, tanning, and mounting are crucial for preserving the integrity and natural beauty of a reptile specimen. These techniques vary depending on the reptile’s species and size, requiring careful attention to detail throughout the process. Improper handling can lead to damage or irreversible deterioration of the specimen.
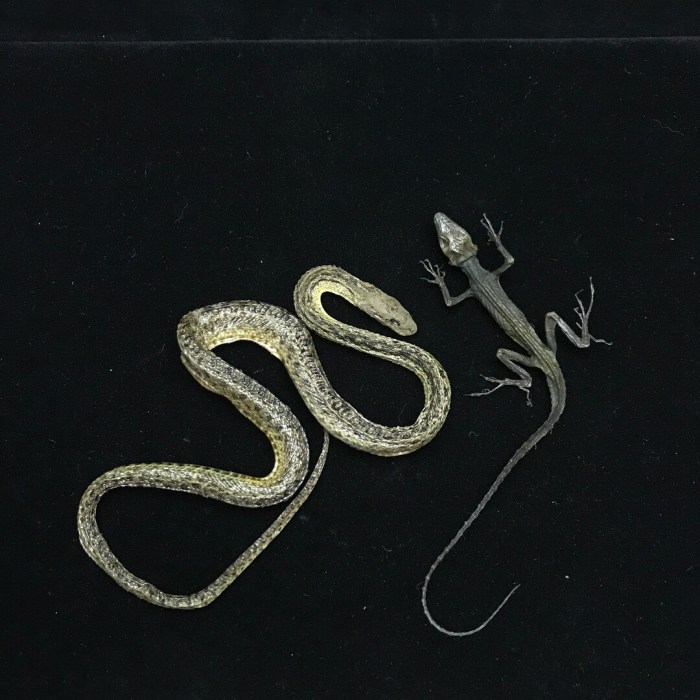
Reptile Skinning Techniques
Skinning techniques differ significantly between snakes, lizards, and turtles due to their diverse skeletal structures and skin characteristics. Snakes are typically skinned using an incision along the belly, carefully separating the skin from the underlying muscle and bone. Lizards, depending on the species, may require incisions along the belly or back, often involving more intricate work around the limbs. Turtles present a unique challenge, necessitating careful removal of the carapace and plastron, followed by meticulous skinning of the body. Sharp, specialized tools are essential to minimize damage to the hide.
Reptile Hide Tanning Methods
Tanning is a crucial step in preserving the reptile hide, preventing decay and ensuring its flexibility. Several methods exist, each with its advantages and disadvantages. Traditional methods, such as brain tanning (using the animal’s brain to provide enzymes), are effective but time-consuming. Modern methods often utilize commercially available tanning solutions, which provide quicker results but may require more precise control to avoid damaging the hide. The choice of tanning method often depends on the reptile species and the taxidermist’s experience. For example, delicate lizard hides might benefit from gentler, slower tanning processes, while more robust snake skins might tolerate faster methods.
Reptile Mounting Techniques
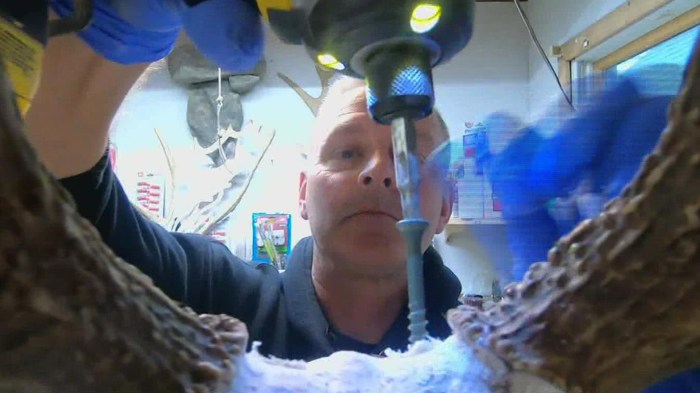
Mounting a reptile requires skill and attention to detail to achieve a lifelike pose and natural appearance. The process involves shaping the tanned hide around an armature, which provides structural support. The armature can be constructed from various materials, such as wire, foam, or wood, depending on the reptile’s size and shape. Careful attention must be paid to the posture, ensuring it reflects the natural behavior of the species. Accurate positioning of the limbs and head is crucial for a realistic presentation.
Mounting Materials Comparison
Various materials are used in reptile mounting, each with its own strengths and weaknesses. Wire armatures offer flexibility and strength, ideal for shaping intricate poses. Foam armatures are lightweight and easy to carve, suitable for larger reptiles. Wood armatures provide excellent rigidity, particularly useful for supporting heavier specimens. The selection depends on the size, shape, and desired pose of the reptile. For example, a small, slender snake might be best mounted using a wire armature, while a large, heavy lizard might require a more robust wood or foam armature.
Mounting a Snake: A Step-by-Step Guide
Before commencing, ensure all necessary tools and materials are prepared. This includes sharp scalpels, tanning solutions, mounting materials (wire, foam, or wood), and display materials (base, etc.). Proper safety precautions must be taken throughout the entire process.
- Step 1: Preparation: Carefully examine the snake, noting its size, coloration, and any unique markings. Make detailed measurements and photographs for reference during the mounting process.
- Step 2: Skinning: Make a precise incision along the belly, carefully separating the skin from the underlying muscle and bone. Use specialized tools to avoid damaging the hide.
- Step 3: Tanning: Apply the chosen tanning solution following the manufacturer’s instructions. Ensure even penetration and allow sufficient time for the hide to tan completely.
- Step 4: Armature Creation: Construct a wire armature that mimics the snake’s skeletal structure. This should be flexible enough to allow for posing but strong enough to provide support.
- Step 5: Mounting: Carefully stretch the tanned hide over the armature, ensuring a smooth, wrinkle-free fit. Pay close attention to the details, such as scales and patterns.
- Step 6: Shaping and Posing: Adjust the armature to achieve the desired pose, ensuring it is natural and lifelike. Secure the hide in place with appropriate adhesives.
- Step 7: Finishing: Once the pose is finalized, allow the adhesive to dry completely. Clean the specimen, and apply any necessary finishing touches.
- Step 8: Display: Mount the finished specimen onto a suitable display base, ensuring it is securely attached and aesthetically pleasing.
Finishing Touches and Display
The final stages of reptile taxidermy are crucial for achieving a realistic and aesthetically pleasing result. Careful attention to detail during finishing ensures the mounted specimen is both accurate and visually appealing, reflecting the skill and dedication of the taxidermist. Overlooking these steps can significantly detract from the overall quality of the finished piece.
Common Mistakes to Avoid
Several common pitfalls can compromise the final appearance of a taxidermied reptile. These often stem from rushing the process or lacking attention to detail. For instance, uneven paint application on the scales can look unnatural and detract from the realism. Similarly, poorly positioned limbs or an unnatural posture can make the reptile appear stiff and lifeless. Another frequent mistake is using inappropriate materials for eye creation, resulting in eyes that lack the subtle shine and depth of a living reptile. Finally, neglecting proper sealing and protection can lead to deterioration and damage over time.
Creating Realistic Eyes and Adding Details
Realistic eyes are paramount to a successful taxidermy project. High-quality glass eyes, carefully selected to match the species and size of the reptile, are generally preferred. The eyes should be meticulously inserted and positioned to capture the subtle nuances of a living animal’s gaze. Adding fine details, such as carefully painted scales, subtle texture to the skin, and even minute imperfections, significantly increases realism. For example, using a fine brush and high-quality acrylic paints, one can replicate the intricate patterns and coloration of individual scales, adding depth and texture to the skin. This meticulous attention to detail elevates the piece from a mere representation to a captivating work of art.
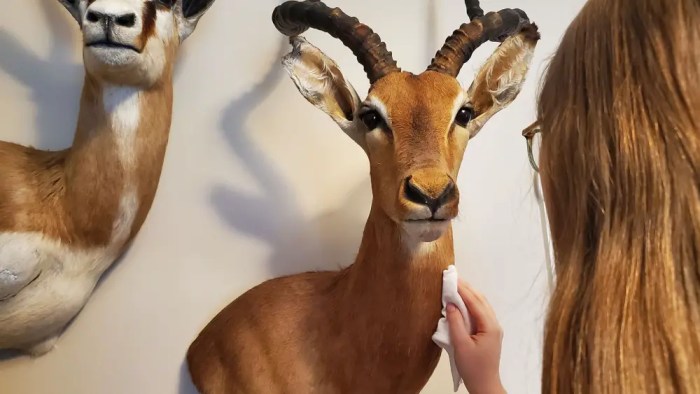
Display Methods for Mounted Reptiles
The choice of display method significantly impacts the overall presentation of a taxidermied reptile. Simple, elegant displays can highlight the specimen’s beauty, while more elaborate settings can create a compelling narrative. A mounted lizard might be presented on a naturalistic branch, mimicking its natural habitat. Alternatively, a custom-made display case, with carefully chosen background and lighting, provides a controlled environment to showcase the specimen’s details. Larger reptiles may benefit from a more dramatic display, perhaps perched atop a rock formation or nestled amongst carefully selected vegetation. The key is to select a method that complements the reptile’s characteristics and enhances its visual appeal.
Long-Term Care and Preservation
Proper care and preservation are vital for maintaining the quality of a taxidermied reptile for years to come. Protecting the specimen from dust, direct sunlight, and extreme temperature fluctuations is crucial. Regularly inspecting the piece for any signs of damage or deterioration and addressing any issues promptly will help preserve its condition. Keeping the display case clean and free of dust will help maintain the overall presentation. In some cases, professional cleaning and restoration may be necessary over time to address minor wear and tear. Proper storage and handling are key to ensuring the longevity of the taxidermy work.
Custom Display Case for a Mounted Lizard
Creating a custom display case allows for complete control over the presentation of the mounted lizard. This can be a simple, clear acrylic box or a more elaborate structure incorporating elements of the lizard’s natural habitat.
| Material | Description | Function | Cost (Estimate) |
|---|---|---|---|
| Clear Acrylic Sheet | 1/4″ thick, cut to size | Forms the sides and top of the case | $50 – $100 |
| Wooden Base | Small, sturdy base, stained dark brown | Provides stability and a finished look | $20 – $40 |
| Artificial Plants | Small, realistic-looking plants appropriate to the lizard’s habitat | Adds visual interest and context | $15 – $30 |
| LED Lighting | Small, battery-powered LED strip lights | Provides subtle illumination and enhances display | $10 – $20 |
Closure
Mastering reptile taxidermy is a journey that blends artistry and scientific precision. By following ethical guidelines, employing proper techniques, and paying meticulous attention to detail, you can create enduring tributes to these remarkable animals. This guide has provided a foundational understanding, but continued practice and refinement will ultimately define your success. Remember, patience and a keen eye for detail are key to perfecting this intricate art form. The end result – a beautifully preserved reptile, a testament to nature’s wonder – is a reward in itself.