Transforming a lifeless bird into a lifelike masterpiece requires meticulous attention to detail, particularly when it comes to the feathers. This guide delves into seven essential taxidermy techniques, transforming your understanding of feather preparation, mounting, and finishing. From sourcing ethically-obtained feathers to employing advanced techniques for realism and durability, we’ll explore the artistry and precision involved in perfecting bird feather detail.
Mastering these techniques isn’t merely about replicating nature; it’s about understanding the delicate structure of feathers and applying the right methods to achieve a truly breathtaking result. We’ll cover everything from selecting and cleaning feathers to employing specialized adhesives and tools for shaping and sculpting, ensuring your taxidermy projects showcase the beauty and intricacy of avian plumage.
Pre-Preparation & Feather Selection

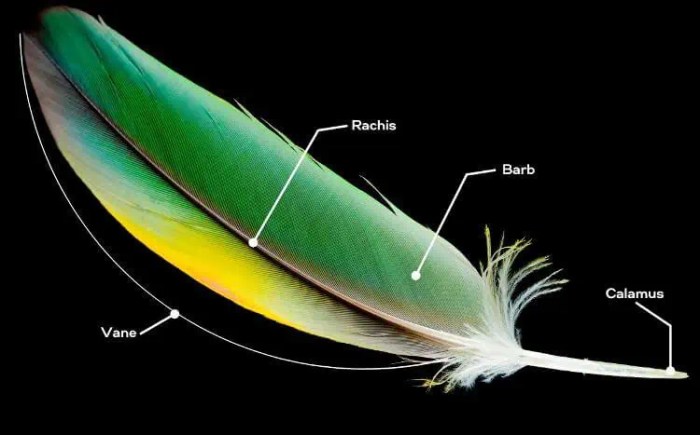
Careful feather selection and preparation are paramount to achieving realistic and high-quality results in bird taxidermy. The quality of the feathers directly impacts the final appearance of the mounted bird, influencing its overall aesthetic appeal and the accuracy of its representation. Proper pre-preparation ensures the feathers remain supple and vibrant, facilitating easier manipulation and a more natural-looking finished product.
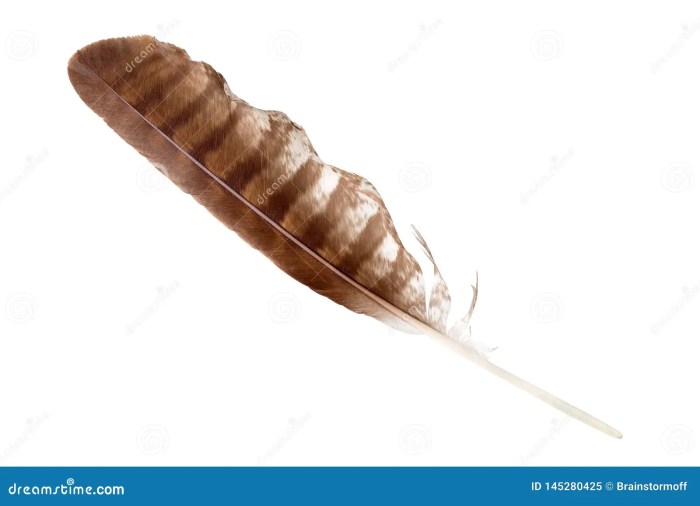
The ideal feathers for taxidermy possess several key characteristics. They should be clean, free from damage, and retain their original color and luster. Avoid feathers with significant wear, breakage, or discoloration. The barbs should be intact and lie smoothly, ensuring a sleek and unruffled appearance. Feathers exhibiting signs of oil staining or significant fading are generally unsuitable. The overall condition should reflect the health and vitality of the bird during its life. The selection process begins with a critical assessment of each feather, evaluating its suitability based on these criteria.
Sourcing High-Quality Bird Feathers
Ethical sourcing is crucial when acquiring bird feathers for taxidermy. Several methods exist, each carrying its own implications. One common method involves collecting shed feathers from naturally molted birds. This method is considered the most ethical, minimizing harm to the birds. Alternatively, feathers can be sourced from reputable suppliers who obtain them ethically, often through partnerships with zoos, wildlife rehabilitation centers, or farms specializing in poultry. However, it’s crucial to verify the supplier’s ethical practices before purchasing. Finally, using feathers from ethically sourced specimens, such as birds that have died naturally and were legally obtained, is also an acceptable method. The selection process must always prioritize ethical considerations and legal compliance. Purchasing feathers from unregulated sources could contribute to illegal wildlife trade and endanger bird populations.
Cleaning and Preserving Collected Feathers
Before mounting, collected feathers require thorough cleaning and preservation to maintain their quality and prevent degradation. This process ensures the feathers remain pliable and retain their natural appearance throughout the mounting process.
- Initial Inspection: Carefully examine each feather for dirt, debris, or parasites. Remove any visible contaminants gently with tweezers or a soft brush.
- Gentle Cleaning: For most feathers, a gentle hand washing in cool, soapy water is sufficient. Use a mild detergent and avoid harsh scrubbing, which can damage the delicate barbs. Rinse thoroughly and gently blot dry with a soft cloth.
- Drying: Allow feathers to air dry completely away from direct sunlight or heat. Avoid using hair dryers or other heat sources, as this can damage the feather structure. Ideally, let them dry naturally in a cool, shaded area.
- Storage: Once dry, store feathers in a cool, dry place, away from direct sunlight and humidity. Use acid-free tissue paper or archival-quality storage boxes to prevent damage and maintain their quality.
Feather Cleaning Methods Comparison
| Feather Type | Cleaning Method | Pros | Cons |
|---|---|---|---|
| Downy Feathers (e.g., from waterfowl) | Gentle hand washing with mild detergent, followed by air drying | Effective for removing surface dirt and oils without damaging the delicate structure. | Can be time-consuming to dry completely; requires careful handling to prevent matting. |
| Flight Feathers (e.g., from raptors) | Careful brushing with a soft brush to remove loose debris, followed by air drying. | Minimizes risk of damage to the strong feather structure. | Less effective for removing embedded dirt or oils. |
| Small, delicate feathers (e.g., from songbirds) | Gentle rinsing in cool water, followed by air drying on a clean, soft surface. | Preserves the delicate structure; avoids harsh chemicals. | May require more delicate handling and longer drying time. |
| Oily Feathers (e.g., from waterfowl) | Washing with a mild detergent solution designed for delicate fabrics, followed by rinsing and thorough air drying. | Removes oil effectively without damaging the feather structure. | Requires specialized detergent; more time-consuming. |
Mounting Techniques
Securing and shaping feathers to create a lifelike bird mount requires careful consideration of several factors, including feather type, adhesive selection, and sculpting techniques. The goal is to achieve a seamless integration of the feathers with the underlying mount, resulting in a natural and aesthetically pleasing final product. Proper mounting ensures the longevity and display quality of the taxidermied bird.
Three primary methods exist for attaching feathers to a bird mount: adhesive application, sewing, and pinning. Each method presents unique advantages and disadvantages, influencing the choice based on the specific feather and mount characteristics.
Adhesive Application Methods
Using adhesives offers a versatile and often invisible method for attaching feathers, particularly smaller ones or those requiring precise placement. However, selecting the correct adhesive and applying it skillfully is crucial to avoid damage to the feathers or creating unsightly glue lines. The wrong adhesive can also lead to feather degradation over time.
- Cyanoacrylate (Super Glue): This fast-acting adhesive is excellent for small feathers and detailed work. Apply a tiny amount to the base of the feather and carefully position it on the mount. Excess glue can be carefully removed with a fine-tipped tool, but speed is essential as it sets quickly. It is best used for feathers that are firmly attached to the skin.
- Water-Based PVA Glue: A more forgiving option, PVA glue allows for some repositioning before setting. It is suitable for larger feathers and areas where more control is needed. Apply sparingly, ensuring even distribution to prevent clumping. Allow ample drying time to prevent distortion.
- Hide Glue: A traditional taxidermy adhesive, hide glue is known for its flexibility and reversibility. It’s excellent for larger feathers and areas where potential adjustments may be needed. However, it requires more preparation and precise application to avoid visible seams. It is also slower drying than the other options.
Feather Shaping and Sculpting
Achieving a natural curve and texture in the feathers is critical for realism. This requires a delicate touch and the use of appropriate tools. The process involves carefully manipulating the individual barbs and barbules to restore their natural form and positioning.
- Assessment: Carefully examine the feathers to understand their natural shape and any damage. Note the direction of the barbs and barbules.
- Rehydration (if needed): Dry or brittle feathers may benefit from gentle rehydration. This can be achieved by carefully misting the feathers with distilled water. Avoid over-saturation.
- Sculpting Tools: Use fine-tipped tweezers, small brushes, and possibly a needle tool to carefully manipulate the barbs and barbules. Gently separate matted feathers, and reposition them to achieve a natural look. Avoid excessive force.
- Setting: Once the desired shape is achieved, allow the feathers to dry completely before further handling. This may involve using a low-heat hair dryer on a cool setting, or simply allowing them to air dry. The choice of method depends on the feather type and the level of moisture.
Sewing and Pinning Techniques
While less common for fine feather detail work, sewing and pinning offer alternative methods, particularly useful for larger feathers or areas where adhesive might be less effective. Sewing provides a strong, permanent bond, but requires skill and can leave visible stitches. Pinning is a temporary method, suitable for holding feathers in place during the initial shaping and drying process.
Advanced Techniques & Finishing Touches
Achieving a truly lifelike and durable bird mount requires attention to detail beyond basic mounting techniques. The final stages involve refining the feather arrangement, enhancing coloration, and protecting the finished piece from environmental degradation. These advanced techniques are crucial for creating a taxidermy piece that will not only look realistic but also stand the test of time.
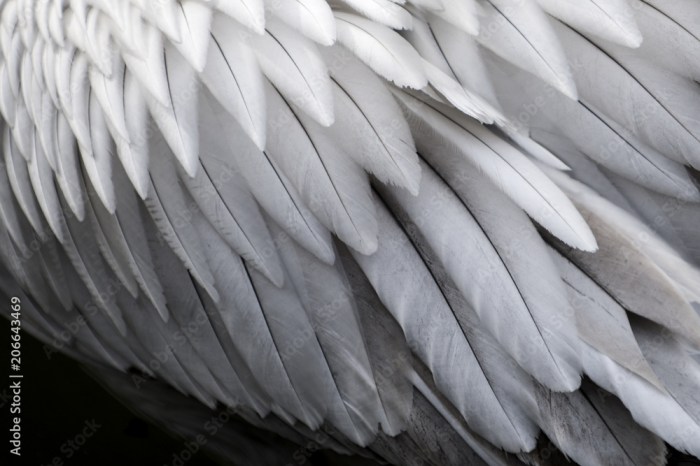
Feather Layering and Arrangement
Precise feather layering and arrangement are paramount in creating a realistic bird mount. Proper placement mimics the natural overlapping and positioning of feathers, contributing significantly to the overall appearance and texture. Incorrect layering can lead to an unnatural, flat appearance, detracting from the realism of the piece. The following table illustrates the layering process for different feather types.
| Feather Type | Layer Position | Placement Technique | Considerations |
|---|---|---|---|
| Down Feathers | Base Layer | Gently applied, ensuring even coverage | Provides a smooth, even base for other feathers; crucial for insulation and natural texture. |
| Contour Feathers | Mid-Layer | Overlapping in a shingle-like pattern, following natural feather growth | Pay close attention to the direction of the barbules; ensure natural curvature and flow. |
| Flight Feathers | Outer Layer | Careful insertion into the wing and tail structure, maintaining proper alignment and spacing | Requires precision to avoid misalignment; use tweezers to carefully position each feather. |
| Coverts | Transitional Layers | Used to blend contour and flight feathers; carefully placed to create a seamless transition. | Important for natural look; placement requires careful observation of reference material. |
Feather Color Enhancement and Restoration
Specialized dyes and paints can be used to enhance feather coloration or restore faded feathers, bringing a bird mount back to its original vibrancy. However, it is crucial to use these products judiciously and with a keen eye for detail, as improper application can lead to an unnatural or blotchy appearance.
The selection of appropriate dyes and paints depends on the type of feather and the desired effect. Water-based acrylic paints are often preferred due to their versatility and ease of application. Oil-based paints can provide a more durable finish but require more careful application.
- Materials: Acrylic paints (various colors), fine-tipped brushes, water, mixing palette, cotton swabs, protective gloves.
- Safety Precautions: Always work in a well-ventilated area. Wear protective gloves and eye protection. Avoid inhaling paint fumes. Dispose of used materials responsibly.
Sealing and Protecting the Finished Piece
Sealing the finished taxidermy piece is crucial for its longevity and preservation. A sealant protects the feathers from dust, moisture, and UV damage, preventing fading and degradation. Several sealant options exist, each with its advantages and disadvantages.
A comparison of sealant options:
- UV-resistant varnish: Provides excellent protection against UV damage and fading, but can sometimes alter the texture of the feathers if applied too heavily.
- Acrylic sealant: Offers good protection against moisture and dust, is relatively easy to apply, and generally maintains the natural texture of the feathers.
- Aerosol sealant: Convenient for even application, but requires careful control to avoid overspray and potential damage.
The choice of sealant will depend on the specific needs of the taxidermy piece and the preferences of the artist. Testing on a small, inconspicuous area is recommended before applying sealant to the entire piece.
Last Recap
By mastering the seven techniques Artikeld, you’ll elevate your taxidermy skills to a new level, capable of producing remarkably realistic and enduring bird mounts. The attention to detail, from feather selection and preparation to the application of finishing touches, ensures that your creations not only capture the beauty of the bird but also stand as testaments to your craftsmanship. Remember that ethical sourcing and preservation are paramount, ensuring the legacy of these avian wonders continues through your art.