Preserving the beauty of avian life through taxidermy is a rewarding yet intricate process. This detailed guide walks you through eight essential steps, from initial preparation and sanitation to the delicate art of skinning, fleshing, and mounting your subject. We’ll explore the necessary tools, techniques, and crucial considerations to ensure a respectful and successful taxidermy experience, resulting in a lasting tribute to nature’s artistry.
This guide emphasizes careful handling and meticulous attention to detail, ensuring that the final result accurately reflects the bird’s natural form and beauty. We’ll delve into various methods, comparing advantages and disadvantages, allowing you to choose the approach best suited to your skill level and the specific bird you are working with. The process demands patience and precision, but the outcome is a truly unique and cherished piece.
Essential Tools and Preparation

Before embarking on the intricate process of bird taxidermy, meticulous preparation is paramount. Gathering the necessary tools and ensuring a clean, safe workspace are crucial steps that directly impact the final result and your safety. Proper sanitation prevents the spread of disease and ensures the longevity of your preserved specimen.
Necessary Tools and Materials
A well-equipped workspace is essential for successful bird taxidermy. The following table Artikels the necessary tools and materials, their purpose, and where they can typically be sourced.
| Tool Name | Description | Purpose | Where to Source |
|---|---|---|---|
| Sharp Scalpel or Dissecting Scissors | Fine-bladed instrument for precise cutting. | Used for skinning the bird and separating tissues. | Taxidermy supply stores, medical supply stores, online retailers. |
| Forceps | Tweezers with fine tips. | Used for manipulating small tissues and removing debris. | Taxidermy supply stores, medical supply stores, online retailers. |
| Fine-tipped Scissors | Small scissors with sharp points. | Used for trimming and detailed cutting. | Taxidermy supply stores, craft stores, online retailers. |
| Taxidermy Needles | Specialized needles with a blunt tip. | Used for sewing the skin back together. | Taxidermy supply stores, online retailers. |
| Taxidermy Thread | Strong, thin thread designed for taxidermy. | Used for stitching the skin during reassembly. | Taxidermy supply stores, online retailers. |
| Borax or Arsenical Soap | Preservative for preventing decay. | Used to preserve the bird’s skin and prevent decomposition. | Taxidermy supply stores, online retailers. |
| Cotton or Poly-fil | Filling material for body cavity. | Used to restore the bird’s natural shape after skinning. | Craft stores, taxidermy supply stores, online retailers. |
| Measuring Tape | Accurate measuring tool. | Used to take measurements for accurate form fitting. | Hardware stores, craft stores, online retailers. |
| Manikin or Bird Form | Artificial body form for the bird. | Provides structure and support for the preserved skin. | Taxidermy supply stores, online retailers. |
| Eye Inserts | Artificial eyes that match the bird’s species. | Replaces the bird’s natural eyes. | Taxidermy supply stores, online retailers. |
| Gloves | Disposable nitrile or latex gloves. | Protects the handler from bacteria and potential contaminants. | Medical supply stores, pharmacies, online retailers. |
| Work Surface | Clean and spacious work area. | Provides a sanitary space to work. | N/A (existing space prepared for work) |
Sanitation and Safety Measures
Maintaining a sterile work environment is crucial to prevent the spread of bacteria and disease. Always wear disposable gloves throughout the entire process. Proper ventilation is also important, as some preservatives can release fumes. Dispose of all waste materials responsibly, following local regulations for biological waste disposal. Sharp instruments should be handled with extreme care to avoid injury.
Preparing the Bird for Taxidermy
Before beginning the taxidermy process, the bird must be prepared appropriately. This involves proper handling and initial cleaning. If the bird is freshly deceased, it should be refrigerated as soon as possible to slow down decomposition. If the bird has been frozen, allow it to thaw completely before starting. Using a gentle touch, examine the bird for any damage. Clean any visible dirt or debris from the feathers using a soft brush or cotton swabs. Note the bird’s posture and features to guide reconstruction. For birds found dead, it is important to assess the cause of death, and if there is any risk of disease, appropriate precautions should be taken to prevent exposure. Consider consulting with a professional if there is any uncertainty.
Skinning and Fleshing the Bird

Careful skinning and fleshing are crucial for a successful taxidermy project. A clean, properly fleshed skin ensures the bird’s final appearance is natural and prevents decay. This process requires patience and attention to detail, but with the right techniques, it can be accomplished efficiently.
The process begins with making an incision along the bird’s abdomen, from the bottom of the breastbone to the vent. Carefully separate the skin from the underlying muscle and flesh using a scalpel or sharp knife. Work slowly and deliberately, using your fingers to loosen the skin from the body. Be especially careful around the legs and wings, as the skin is more delicate in these areas. Once the skin is separated from the body, you can carefully remove the wings and legs at the joints. Next, work your way around the neck, carefully separating the skin from the skull. Remember to preserve the skull and feet, which we will discuss later. Once the skin is completely removed, use a fleshing tool or a dull knife to scrape away any remaining muscle, fat, and tissue. Thoroughness is key at this stage to prevent decay and ensure a long-lasting mount. Be careful not to puncture the skin during this process. Pay close attention to the areas around the wings, legs, and neck, where flesh often remains.
Skull Preservation Methods
Preserving the bird’s skull is important for maintaining the integrity of the final mount. Several methods exist, each with its own advantages and disadvantages.
- Method 1: Leaving the skull intact within the skin. This is the simplest method, requiring minimal additional work. However, it can make fleshing more difficult and may lead to incomplete flesh removal around the skull.
- Method 2: Removing and cleaning the skull separately. This method allows for thorough cleaning and preservation of the skull. It can result in a cleaner and more aesthetically pleasing final product. However, it requires more skill and time.
- Method 3: Partial skull removal. Removing only the lower jaw and cleaning that area allows for easier access to the neck and head during fleshing, while still maintaining the majority of the skull structure within the skin. This balances the advantages of both the previous methods.
Foot Preservation Methods
Proper foot preservation is essential for a realistic taxidermy mount. The feet should be carefully cleaned and prepared to maintain their natural shape and appearance.
- Method 1: Leaving the feet attached to the skin. This is the simplest method and requires minimal extra work. However, thorough cleaning and fleshing of the feet is essential to prevent decay.
- Method 2: Removing and cleaning the feet separately. This method allows for a thorough cleaning of the feet, ensuring no residual flesh or tissue remains. It also makes it easier to pose the feet during the final mounting process. However, it requires extra steps and care.
Forming and Mounting the Bird
With the skin fleshed and prepared, the next crucial step involves creating and utilizing an artificial body form, upon which the bird’s skin will be meticulously positioned and sewn. This process requires precision and patience to achieve a natural and lifelike result. The form acts as the bird’s new internal structure, providing support and shape.
Creating a suitable form requires careful consideration of the bird’s original body dimensions. Various materials can be employed, including cotton, wood wool, or even commercially available pre-made forms. The chosen material should be easily manipulated to achieve the desired shape and firmness. For smaller birds, a tightly packed cotton ball might suffice, while larger birds might necessitate a more structured form constructed from wood wool, shaped meticulously to replicate the bird’s original body contours. This form will be the foundation for the entire mounting process.
Artificial Body Form Creation
The process of creating the artificial body begins with careful measurements of the bird’s original body. Length, width, and depth should be accurately recorded. Using this data, a form is constructed from the chosen material. For example, with wood wool, small pieces are carefully layered and shaped using fingers and tools like a sculpting tool or even a blunt pencil to create the correct body proportions. The form should be firm enough to hold its shape but pliable enough to allow for adjustments during the skinning process. The form should closely mimic the original bird’s body, including the thickness of the breast, the shape of the keel (breastbone), and the curvature of the back. For larger birds, a wire armature might be incorporated into the form for added structural support. The form’s completion should accurately reflect the bird’s size and shape.
Positioning the Bird’s Skin on the Form
Once the form is ready, carefully begin to position the bird’s skin over it. Start by placing the skin of the back and breast onto the form, ensuring a smooth fit. Take care to avoid stretching or distorting the skin. Next, gently work the wings and legs into their natural positions, making sure they are aligned correctly and not twisted or awkwardly positioned. Use small amounts of cotton or other filler material to add volume where necessary to create a full and natural look. The head should be positioned carefully, making sure the beak is straight and the eyes are aligned correctly. Throughout this process, patience is key. The goal is a smooth, natural fit with no wrinkles or creases.
Sewing the Bird’s Skin
With the skin properly positioned, the final step involves sewing the skin together. This requires a delicate touch and the use of fine, strong thread that matches the bird’s plumage color as closely as possible. The stitches should be small, even, and invisible. Ideally, the thread should disappear almost entirely into the feathers.
For neat and invisible stitches, use a whip stitch or a ladder stitch. Avoid large, bulky stitches that might show through the feathers. Work slowly and carefully, taking your time to ensure each stitch is secure and even. In larger birds, you may want to reinforce the stitches at the base of the wings and legs for added durability. The key is to make the stitches virtually undetectable.
Several stitching techniques can be employed depending on the bird’s size and the area being sewn. For small birds, a simple whip stitch might suffice. This stitch is quick and easy to execute, involving a series of small, overlapping stitches that run along the edge of the skin. For larger birds or areas requiring extra strength, a ladder stitch might be more appropriate. This stitch creates a more secure seam, and it’s less likely to break under stress. The choice of stitch depends largely on personal preference and the specific requirements of the project. Regardless of the chosen technique, consistency and precision are paramount to achieving an aesthetically pleasing and durable result.
Conclusive Thoughts
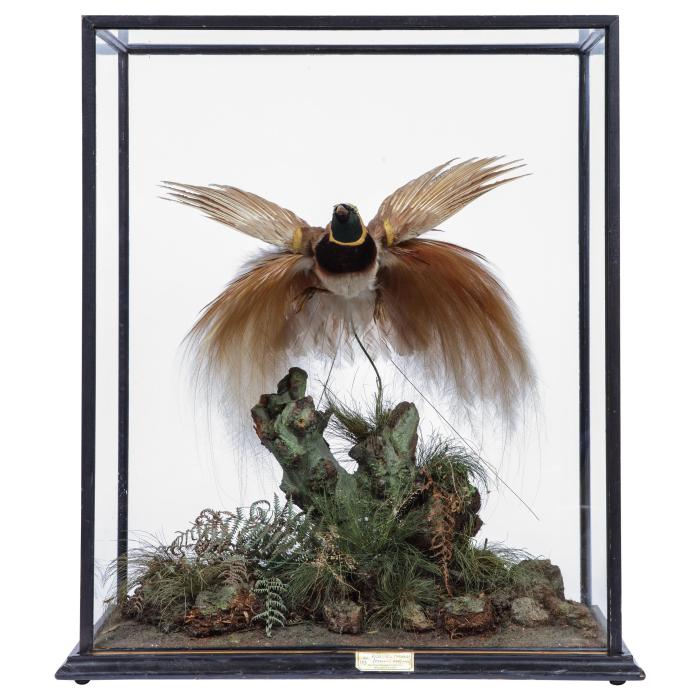
Mastering the art of bird taxidermy requires dedication and practice, but the ability to preserve these creatures for generations to come is a deeply fulfilling endeavor. By following these eight detailed steps and paying close attention to the nuances of each stage, you can transform a delicate avian specimen into a lasting work of art. Remember to always prioritize ethical practices and respect for the animal. The result – a meticulously preserved bird, a testament to both nature’s wonder and your own skill – will be a lasting source of pride and admiration.