Unearthing the past requires more than just excavation; it demands meticulous preparation. This exploration into paleontological taxidermy unveils seven crucial techniques for restoring and preserving invaluable fossil remains. From the delicate cleaning of fragile bones to the artful reconstruction of fragmented skeletons, we’ll delve into the methods that bring ancient life back to view. This journey will reveal the scientific precision and artistic skill required to transform fossilized fragments into captivating displays, ensuring these remnants of the past are not only preserved but also shared with the world.
We will cover a range of essential procedures, including cleaning and stabilization using enzymatic solutions and consolidants, the reconstruction of damaged fossils with casts and fillers, and the creation of stable and aesthetically pleasing mounts. The importance of meticulous documentation and long-term preservation strategies will also be highlighted, ensuring these irreplaceable specimens remain accessible for generations to come.
Fossil Preparation Techniques
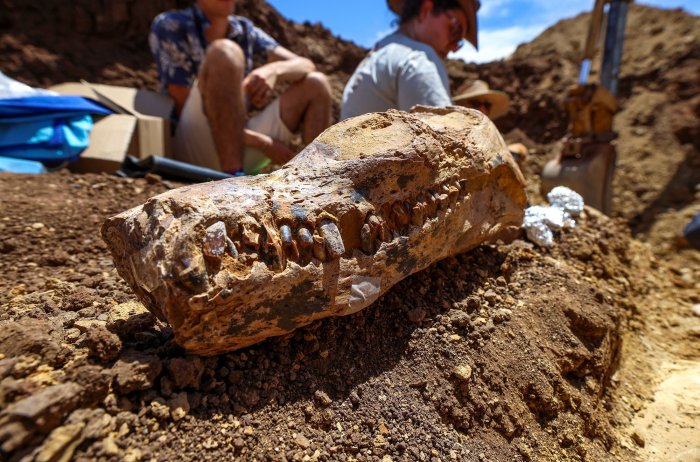
Careful preparation is crucial for revealing the intricate details of fossils and ensuring their long-term preservation. This process involves a delicate balance between removing encasing sediment and stabilizing fragile structures. Improper techniques can lead to irreversible damage, diminishing the scientific value of the fossil. This section will detail key methods for cleaning and stabilizing fossils.
Cleaning Delicate Fossil Bones Using Enzymatic Solutions
Enzymatic solutions offer a gentle yet effective method for cleaning delicate fossil bones, particularly those embedded in sediment. These solutions use enzymes, biological catalysts that break down organic matter without harming the fossil itself. The specific enzyme used depends on the type of sediment and the fossil’s composition. A step-by-step guide for using enzymatic solutions is provided below.
- Assessment: Carefully examine the fossil to determine the type and extent of sediment encasement. Note any particularly fragile areas.
- Enzyme Selection: Choose an appropriate enzyme based on the sediment composition (e.g., protease for protein-rich sediments, cellulase for plant matter). Follow the manufacturer’s instructions for dilution.
- Immersion: Gently immerse the fossil in the enzyme solution. The immersion time varies depending on the concentration of the solution and the type of sediment; regular monitoring is crucial.
- Monitoring and Adjustment: Observe the fossil regularly, checking for sediment removal. If necessary, adjust the concentration of the enzyme solution or the immersion time. Avoid over-treatment, which can damage the fossil.
- Rinsing and Neutralization: After the desired level of cleaning is achieved, thoroughly rinse the fossil with distilled water to remove all traces of the enzyme solution. A neutralizing solution may be necessary to counteract any remaining enzyme activity.
- Drying: Carefully dry the fossil, ideally using a controlled environment to prevent cracking or warping. This may involve air drying, or slow drying in a controlled humidity chamber.
Consolidating Fragile Fossils Using Consolidants
Consolidants are crucial for strengthening fragile fossils, preventing further deterioration, and aiding in their long-term preservation. Several consolidants exist, each with its own properties and applications. The choice of consolidant depends on factors such as the fossil’s composition, the extent of damage, and the desired level of strengthening.
| Consolidant | Chemical Composition | Advantages | Disadvantages |
|---|---|---|---|
| Paraloid B-72 | Poly(methyl methacrylate) | Excellent penetration, good strength, reversible with acetone | Can yellow with age, may not be suitable for all fossil types |
| Butvar B-76 | Polyvinyl butyral | Good adhesion, relatively inexpensive, easy to apply | Less strength than Paraloid B-72, can be brittle |
| Acetone-based Cyanoacrylate | Ethyl cyanoacrylate | Rapid curing, excellent strength for small cracks and fissures | Can be difficult to control, exothermic reaction, potential for damage if not applied carefully |
Removing Sediment from Intricate Fossil Structures
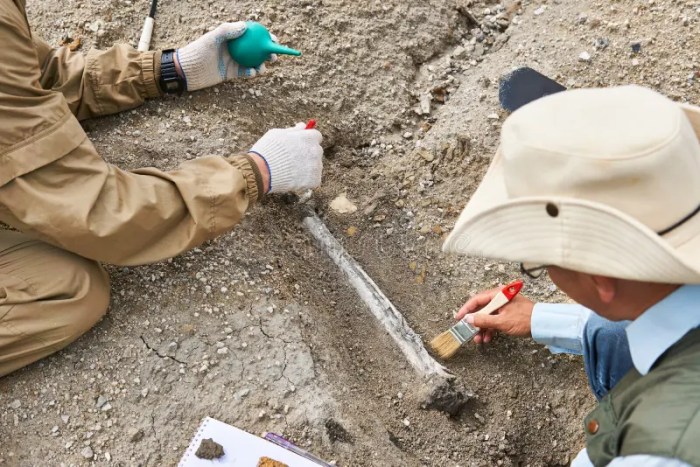
Removing sediment from intricate fossil structures requires specialized tools and techniques to avoid damaging the delicate fossil material. The approach depends on the type of sediment, its adherence to the fossil, and the fossil’s fragility.
The removal of sediment can involve various tools, including micro-picks, dental tools, air abrasives, and ultrasonic cleaning. Micro-picks are used for delicate work, carefully removing sediment grain by grain. Air abrasives utilize a stream of fine abrasive particles propelled by compressed air, allowing for controlled removal of sediment. Ultrasonic cleaning uses high-frequency sound waves to dislodge sediment from crevices and pores, though caution is necessary to avoid damage to the fossil. The selection of the appropriate technique depends on the specific characteristics of the fossil and the encasing sediment. For instance, a delicate fossil with loosely adhered sediment might benefit from the use of micro-picks and brushes, whereas a more robust fossil with firmly embedded sediment might be treated with air abrasion.
Fossil Preparation Techniques
Having explored general fossil preparation methods, we now delve into the specialized techniques of reconstruction and mounting, crucial steps in transforming fragmented fossil finds into scientifically valuable and aesthetically pleasing exhibits. These processes require meticulous attention to detail, a strong understanding of the fossil’s anatomy, and a skilled hand.
Reconstruction of a Fragmented Fossil Skull
A plan for reconstructing a fragmented fossil skull, such as a *Tyrannosaurus rex*, necessitates a systematic approach. Initially, all fragments must be meticulously cleaned and documented, including photography and detailed notes on their location within the original matrix. A digital model, potentially using photogrammetry, can aid in visualizing the skull’s original form and identifying missing pieces. Missing sections can be reconstructed using casts created from well-preserved counterpart fragments or, if none exist, by carefully sculpting them using a suitable filler material. Epoxy putty, commonly used in paleontological work, is a versatile option, allowing for fine detail and a durable, stable reconstruction. The filler should match the color and texture of the original fossil as closely as possible to maintain the aesthetic integrity of the reconstruction. Finally, the reconstructed pieces are carefully assembled and stabilized, potentially using adhesives and reinforcing materials such as metal pins or rods, ensuring structural integrity.
Mounting Techniques for Fossils: A Comparison
Different mounting techniques offer varying levels of stability, aesthetic appeal, and preservation. The choice depends on the fossil’s size, fragility, and intended display environment.
- Traditional Matrix Mounting: This involves securing the fossil within its original matrix, providing inherent stability and context. However, it can limit viewing angles and may not be aesthetically pleasing for all specimens. The matrix itself requires careful preparation and stabilization to prevent further deterioration.
- Custom Mounts: These offer flexibility in showcasing the fossil, allowing for optimal viewing angles and aesthetic presentation. Materials such as acrylic, metal, or wood can be used, depending on the fossil’s size, weight, and fragility. Custom mounts must be designed to provide robust support while minimizing stress on the specimen. Proper padding and cushioning are crucial to prevent damage.
- Suspended Mounts: Ideal for larger, lighter fossils, suspended mounts allow for 360-degree viewing. However, they require meticulous engineering to ensure stability and prevent vibrations or swaying, which could damage the specimen. This method often incorporates concealed support structures to maintain a visually appealing presentation.
Creating a Custom Mount for a Unique Fossil Specimen
Constructing a custom mount for a delicate, uniquely shaped fossil, such as a partially preserved *Archaeopteryx* feather, demands careful consideration of its fragility. The first step involves creating a detailed plan, including measurements and sketches, to determine the mount’s design and support structure. A lightweight, clear acrylic mount would be suitable, allowing for unobstructed viewing. The feather would be carefully embedded in a bed of acid-free archival foam, providing gentle support and preventing movement. The foam would be securely placed within the acrylic case, leaving sufficient space to avoid pressure on the fossil. Finally, the acrylic case would be sealed, creating a protective environment that minimizes exposure to dust, light, and fluctuations in temperature and humidity. The entire process emphasizes minimizing contact with the fossil and utilizing materials that will not react with it over time.
Fossil Preparation Techniques

This section details crucial aspects of fossil preparation beyond the mechanical processes: meticulous documentation and long-term preservation strategies are paramount to ensuring the scientific value and longevity of prepared specimens. These steps are essential not only for the immediate project but also for future researchers who may utilize the data and specimen.
Photographic Documentation of Fossil Preparation
High-resolution photography is indispensable for recording the preparation process. Each image should serve as a data point, providing a clear and comprehensive record of the fossil’s state at various stages. Images should be taken with a consistent scale reference (e.g., a ruler or scale bar) included in each shot to provide context for size and scale. Multiple angles and close-ups are necessary to capture all relevant details, including any unique features or areas of concern. For example, an initial image might show the entire fossil block before any preparation begins, followed by a series of images documenting the removal of matrix at specific intervals, focusing on areas of significant detail. Each image should include a detailed caption describing the stage of preparation, the techniques used, and any noteworthy observations. Images should be saved using lossless compression formats (e.g., TIFF) to preserve image quality for future use.
Detailed Documentation of Fossil Preparation Steps
Comprehensive documentation of each step in the preparation process is crucial for reproducibility and future analysis. A detailed log should be maintained, including date, time, tools used, techniques employed, and any observations about the fossil’s condition and composition. For example, the log should record the specific type of air abrasion used (e.g., pressure, nozzle size, abrasive media), the duration of each treatment, and any changes observed in the fossil during preparation. Specific measurements of the fossil before and after each step should also be recorded. This detailed information ensures that the preparation process can be repeated and that any unexpected issues can be identified and addressed. The use of a standardized data format (e.g., a spreadsheet or database) ensures consistency and facilitates data analysis.
Long-Term Preservation of Prepared Fossil Specimens
A long-term preservation plan is vital to prevent degradation and maintain the integrity of the prepared fossil. Environmental factors such as temperature, humidity, and light exposure significantly impact the preservation of fossils. Fluctuations in temperature and humidity can cause expansion and contraction, leading to cracking or damage. Exposure to ultraviolet light can cause fading and degradation of color. To minimize these threats, the fossil should be stored in a stable, climate-controlled environment with low humidity and minimal light exposure. The fossil should be protected from physical damage by storing it in a secure, well-padded container. Regular monitoring of the fossil’s condition and the storage environment is essential to detect any potential issues early on. For particularly delicate or valuable specimens, the use of inert gas storage or encapsulation may be considered. For example, the American Museum of Natural History employs strict environmental controls in its fossil storage facilities to maintain stable conditions and minimize degradation.
Closing Summary
Mastering the art of paleontological taxidermy is a blend of scientific knowledge and artistic finesse. By combining careful cleaning and stabilization techniques with skillful reconstruction and mounting, we can ensure the preservation and presentation of fossils for research, education, and public appreciation. The careful documentation and preservation strategies discussed further guarantee the long-term integrity of these irreplaceable pieces of our planet’s history, allowing us to continue learning from and marvel at the wonders of the past.